Embarking on a creative journey often begins with a simple desire: to capture the beauty around us. For many, the iconic silhouette of a palm tree evokes feelings of relaxation, tropical getaways, and serene landscapes. If you've ever dreamt of sketching these majestic symbols of paradise, you're in the right place. Our comprehensive guide is designed to transform your artistic aspirations into tangible skills, making the seemingly complex art of palm tree drawing accessible and enjoyable for everyone, regardless of their current skill level.
Whether you're a budding artist, a seasoned illustrator looking for fresh inspiration, or simply someone who enjoys doodling, mastering the art of drawing palm trees can significantly enhance your visual vocabulary. From the distinctive texture of their trunks to the graceful sway of their fronds, each element presents a unique artistic challenge and opportunity. Join us as we delve into the fundamental techniques, creative ideas, and essential tips that will empower you to draw stunning palm trees with confidence and flair.
Table of Contents
- The Allure of Palm Tree Drawing: Why They Captivate Artists
- Essential Tools for Your Palm Tree Drawing Journey
- Deconstructing the Palm Tree: Basic Elements
- Step-by-Step Palm Tree Drawing for Beginners
- Elevating Your Palm Tree Drawing: Advanced Techniques
- Exploring Creative Palm Tree Drawing Ideas
- Common Mistakes to Avoid in Palm Tree Drawing
- Practice Makes Perfect: Developing Your Palm Tree Drawing Skills
The Allure of Palm Tree Drawing: Why They Captivate Artists
There's an undeniable magic in the simple act of a palm tree drawing. For centuries, these towering plants have symbolized warmth, relaxation, and exotic beauty, making them a popular subject for artists across various mediums. Their distinctive silhouettes, often seen against vibrant sunsets or pristine beaches, instantly transport viewers to a serene, faraway place. Beyond their picturesque quality, palm trees offer a fantastic opportunity for artists to practice fundamental drawing skills such as perspective, texture, and organic forms. Artists are drawn to palm trees not just for their visual appeal but also for the versatility they offer. A palm tree can be rendered as a stark, dramatic silhouette, a detailed botanical study, or a whimsical element in a cartoon landscape. Their unique structure, from the rough, segmented trunk to the fanning fronds, provides a wealth of textural and compositional challenges that are both engaging and rewarding to overcome. Capturing the essence of a palm tree in a drawing allows an artist to convey a sense of place, mood, and even a narrative, making it a powerful motif in any art collection.Essential Tools for Your Palm Tree Drawing Journey
Before we dive into the actual drawing process, let's talk about the tools you'll need. The good news is that you don't require an elaborate setup to start your palm tree drawing adventure. Simplicity is often key, especially when you're just beginning. * **Pencils:** A good set of graphite pencils is invaluable. You'll want a range, from harder leads (like 2H or H) for initial sketches and light lines, to softer leads (like 2B, 4B, or 6B) for shading, adding depth, and creating darker, richer tones. If you only have one pencil, a standard HB will suffice for most basic needs. * **Erasers:** A kneaded eraser is fantastic for lifting graphite gently without damaging the paper, and a vinyl eraser (like a Staedtler Mars Plastic) is excellent for precise clean-ups. * **Paper:** Any drawing paper will do, but a medium-weight paper (around 60-80 lb or 100-130 gsm) with a slight tooth (texture) will hold graphite well and allow for smooth blending. Sketchbooks are perfect for practice. * **Optional Tools:** * **Charcoal:** For dramatic, high-contrast palm tree drawings, charcoal sticks or pencils can create rich blacks and expressive lines. * **Markers or Pens:** For outlining, adding details, or creating stylized palm trees, fine-liner pens or brush markers can be used. * **Colored Pencils or Pastels:** If you want to add color to your palm tree drawing, these are excellent choices for layering and blending. * **Digital Tablet:** For those who prefer digital art, a drawing tablet and software like Procreate, Photoshop, or Clip Studio Paint offer endless possibilities for experimentation and correction. Remember, the most important "tool" is your willingness to experiment and enjoy the process. Don't let the lack of fancy equipment deter you from starting your palm tree drawing today!Deconstructing the Palm Tree: Basic Elements
To draw a palm tree effectively, it helps to understand its fundamental components. In today’s guide, we will be covering the basic elements of a palm tree's anatomy, breaking down its structure into manageable parts. This foundational knowledge will empower you to draw more realistic and convincing palm trees.Understanding the Trunk
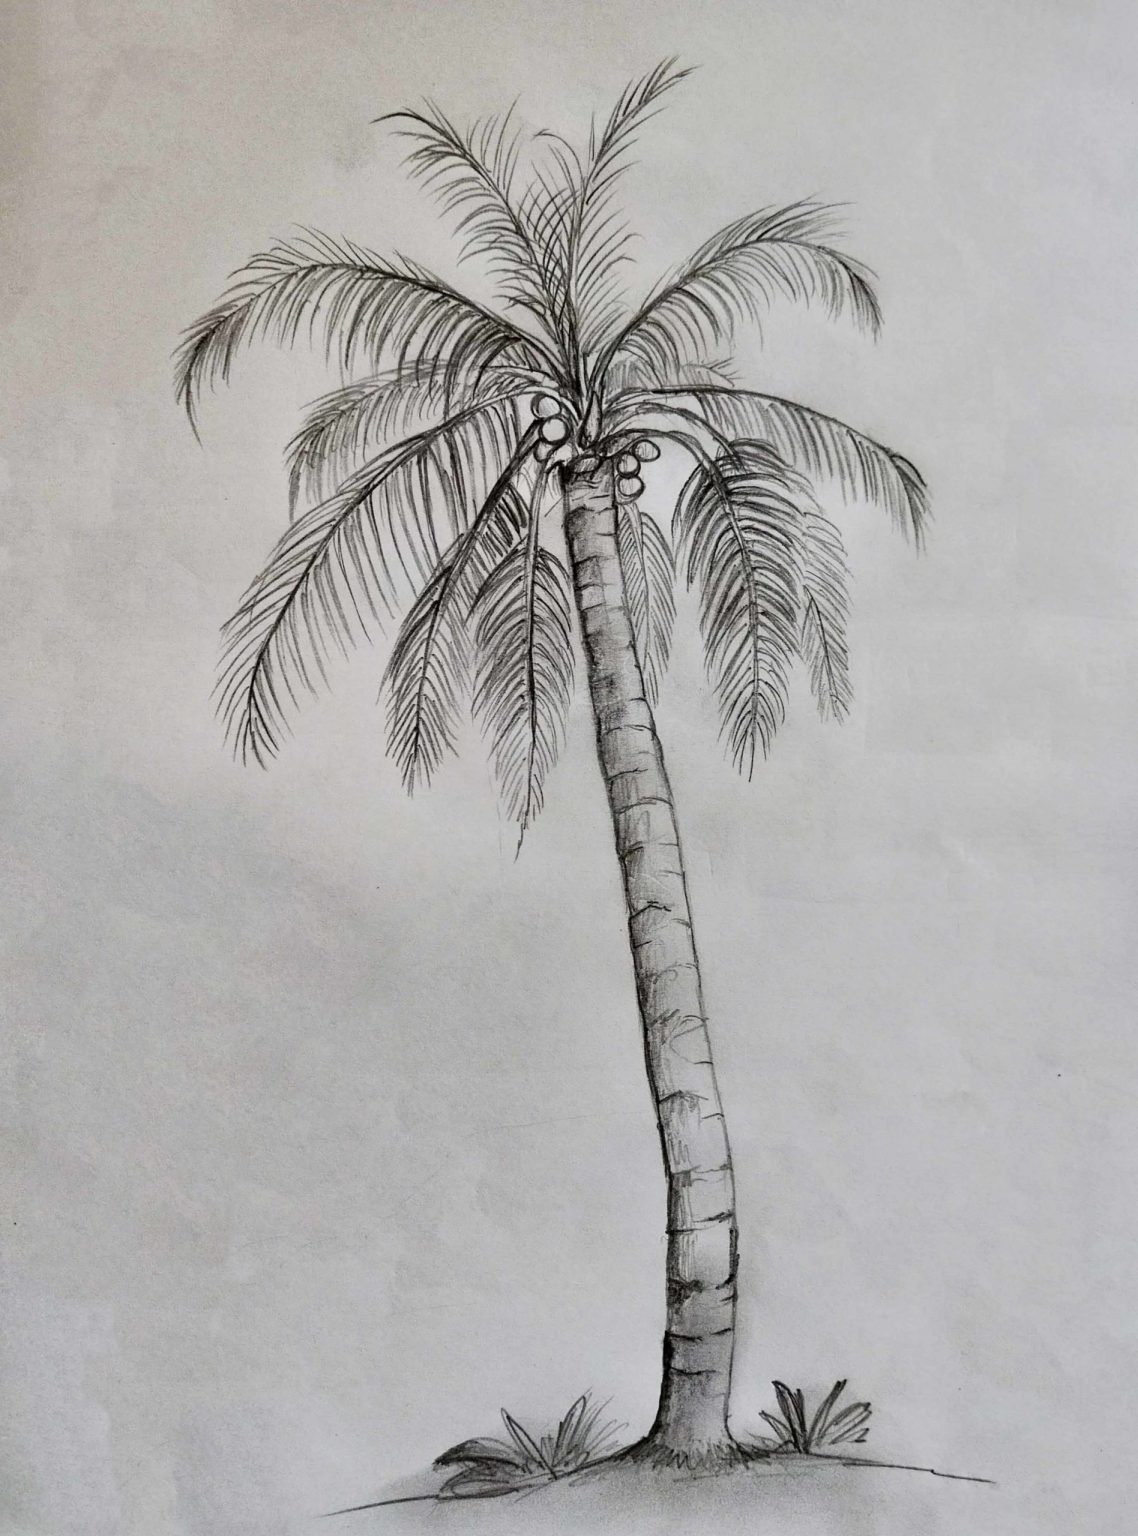
The trunk of a palm tree is its backbone, and it's far from a simple straight line. Palm trunks typically have a slightly curved, often tapering shape, wider at the base and narrowing towards the top. What truly defines them, however, is their distinctive texture. Unlike smooth tree bark, palm trunks are usually covered in rings or segments, which are remnants of old frond bases. The easiest way to draw all those notches is to start with the basic cylindrical shape, then lightly sketch in horizontal or slightly curved lines to indicate these segments. These lines shouldn't be perfectly uniform; vary their spacing and thickness to mimic natural growth. Some palm species have very prominent, almost diamond-shaped scars, while others have smoother, more fibrous trunks. Observing reference images will greatly assist you in capturing these nuances. Adding subtle shading along the edges of these segments will give the trunk a three-dimensional, textured appearance.Mastering the Fronds (Leaves)
The fronds are arguably the most iconic part of a palm tree. They are typically large, fan-shaped (palmate) or feather-shaped (pinnate), and radiate outwards from the top of the trunk. Getting them right is crucial for a realistic palm tree drawing. This tutorial will show students how to draw a palm tree, and make those signature leaves look as real as possible. * **Overall Shape:** Start by lightly sketching the general outline of the fronds. Think of them as large, sweeping curves that fan out. They don't all point straight up; some will droop, some will curve upwards, creating a dynamic crown. * **Central Rib:** Each frond has a central rib (rachis) from which individual leaflets extend. Sketch these ribs first, giving them a natural curve. * **Individual Leaflets:** These are the smaller, narrow blades that make up the frond. Instead of drawing every single one, focus on suggesting them. Use quick, short strokes along the central rib, following the curve of the frond. Vary the length and angle of these strokes to create a natural, feathery look. Remember that light passes through these, so they often appear lighter at the edges. * **Overlap and Depth:** Fronds will overlap each other. Pay attention to which fronds are in front and which are behind, using overlapping lines to create depth.Adding Coconuts and Details
Once you have the trunk and fronds established, you can add those charming details that bring your palm tree drawing to life. * **Coconuts:** If your palm tree is a coconut palm, add clusters of coconuts near the base of the fronds. They are typically round or oval-shaped and hang in groups. Use simple circles or ovals and add subtle shading to give them volume. * **Fallen Fronds/Stubs:** At the base of the crown, you might see remnants of old, cut-off fronds, which add to the texture of the trunk. * **Shadows:** Consider your light source. Shadows cast by the fronds on the trunk, and by the entire tree on the ground, will add immense realism and depth to your drawing. * **Background Elements:** A palm tree rarely stands alone. Consider adding a horizon line, a distant ocean, or a sandy beach to complete the scene. By focusing on these basic elements and practicing them individually, you'll soon be able to combine them to create a cohesive and captivating palm tree drawing.Step-by-Step Palm Tree Drawing for Beginners
Now that we've covered the basics, let's put it all together with a simple, step-by-step guide. This easy palm tree tutorial is perfect for young students looking to learn how to draw, but it's equally effective for adult beginners. All drawing steps are included here which make it fun and easy to follow! Learn how to draw a great looking palm tree with easy drawing instructions and video tutorial (imagine this as a link to a hypothetical video tutorial). **Step 1: The Basic Trunk Shape** * Start by drawing two slightly curved, parallel lines that taper slightly towards the top. Think of a gentle "S" curve for one side and a reverse "S" for the other, meeting at the top. This forms the basic outline of your palm tree trunk. Don't make it perfectly straight; a slight lean adds character. **Step 2: Adding Trunk Texture** * Along the trunk, draw a series of horizontal or slightly curved lines. These lines should not be perfectly straight or evenly spaced. Vary their length and angle slightly to create the impression of natural segments or scars. The easiest way to draw all those notches is to start with the basic shape and then add these details. You can add a few small, jagged lines within these segments to suggest rough texture. **Step 3: Sketching the Frond Bases** * At the very top of the trunk, where the lines meet, draw a small, slightly rounded shape. From this point, draw a few short, curved lines radiating outwards. These will be the bases from which your fronds emerge. Think of them as the "arms" of the palm tree. **Step 4: Drawing the Main Frond Shapes** * From each of the frond bases you just drew, extend long, graceful curved lines. These are the central ribs of your fronds. Think of them as large, sweeping arcs that fan out from the top of the trunk. Some can curve upwards, others downwards, creating a dynamic crown. Aim for an odd number of fronds (e.g., 5 or 7) for a more natural look. **Step 5: Adding the Leaflets** * Now for the feathery part! Along each main frond line, draw a series of short, quick strokes extending outwards. These are the individual leaflets. Start from the base of the frond and work your way to the tip. Make sure the strokes follow the overall curve of the frond. They should be denser near the center and might thin out towards the tip. Don't draw every single leaflet; suggest them with varying lengths and angles. **Step 6: Refining and Adding Details** * Go over your lines, making them darker where necessary. Add subtle shading to the trunk, especially along the edges of the segments, to give it dimension. You can also add a few small circles or ovals near the base of the fronds to represent coconuts. * Consider adding a ground line or a hint of sand at the base of the tree. By following the simple steps, you too can easily draw a perfect palm tree. Remember, practice is key. Don't be afraid to make mistakes; they are part of the learning process.Elevating Your Palm Tree Drawing: Advanced Techniques
Once you're comfortable with the basic palm tree drawing, you can begin to explore more advanced techniques to add realism, depth, and artistic flair to your work. * **Perspective:** Palm trees, especially when part of a landscape, are subject to perspective. If you're drawing a row of palm trees receding into the distance, they will appear smaller and less detailed the further away they are. Use vanishing points to ensure your trees align correctly within the scene. * **Shading and Light Sources:** Understanding how light interacts with the palm tree is crucial for creating a three-dimensional effect. Identify your light source (e.g., the sun). Areas facing the light will be brighter, while areas away from it will be in shadow. The trunk will have a cylindrical shadow, and the fronds will cast complex shadows on themselves and the trunk. Don't forget the cast shadow on the ground, which anchors the tree in its environment. * **Texture Rendering:** Go beyond simple lines for the trunk. Use cross-hatching, stippling, or varied pressure to create a convincing rough, fibrous, or segmented texture. For the fronds, use directional strokes that follow the growth pattern of the leaflets, suggesting their papery or leathery feel. * **Composition:** A single palm tree drawing can be powerful, but combining multiple trees or integrating them into a larger scene requires good composition. Consider the rule of thirds, leading lines, and negative space to create a visually appealing arrangement. Overlapping trees can add depth and interest. * **Atmospheric Perspective:** For distant palm trees, lighten their tones and reduce their detail to simulate the effect of atmospheric haze, making them appear further away.Exploring Creative Palm Tree Drawing Ideas
Beyond drawing a single, isolated palm tree, there's a vast ocean of creative possibilities waiting to be explored. In this post, we’ll share 25 easy and enjoyable palm tree drawing ideas to inspire your artwork and help you think outside the box.Backgrounds and Settings
The environment surrounding your palm tree can dramatically alter the mood and narrative of your drawing. You can try different styles, experiment with backgrounds like sunsets or islands, or even add details like: 1. **Sunset Silhouette:** Draw the palm tree as a dark silhouette against a vibrant, multi-colored sky. Focus on the crisp edges of the fronds and trunk. 2. **Beach Scene:** Place your palm tree on a sandy beach, with gentle waves lapping at the shore. Add footprints in the sand or a stray seashell. 3. **Tropical Island:** Imagine a small, deserted island with several palm trees, surrounded by crystal-clear water. 4. **Moonlit Night:** Depict a palm tree under a full moon, with subtle lighting and long, dramatic shadows. 5. **Rainy Day:** Show a palm tree with rain streaks, wet fronds, and puddles reflecting the sky. 6. **Stormy Weather:** A palm tree bending in the wind, with dramatic clouds and perhaps lightning in the distance. 7. **Oasis in the Desert:** A lone palm tree by a small pool of water, offering shade in a vast desert landscape. 8. **Cityscape with Palms:** Integrate palm trees into an urban setting, perhaps lining a boulevard or standing tall against modern buildings. 9. **Overlooking a Bay:** Draw a palm tree on a cliff or hill, with a beautiful bay or harbor stretching out below. 10. **Hammock Scene:** A classic: a hammock strung between two palm trees, inviting relaxation.Stylistic Variations
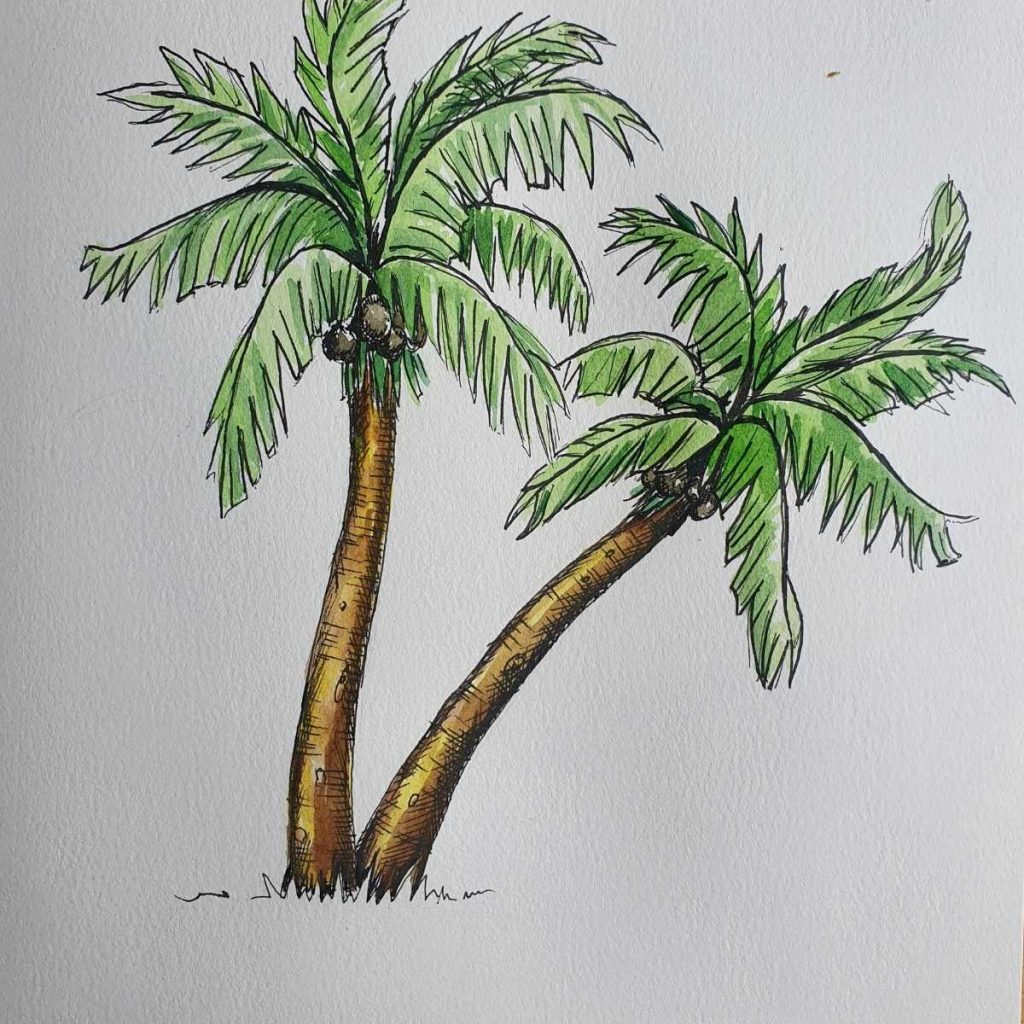
Don't feel confined to realistic representations. Palm trees are incredibly versatile and can be adapted to various artistic styles. You can try different styles, experiment with backgrounds like sunsets or islands, or even add: 11. **Cartoon Style:** Simplify the shapes, use bold outlines, and exaggerate features for a whimsical, animated look. 12. **Abstract Palm:** Focus on the patterns, lines, and textures of the palm tree, breaking it down into abstract shapes and colors. 13. **Minimalist Silhouette:** A very simple, clean outline of a palm tree, relying on negative space for impact. 14. **Pop Art Palm:** Use bright, contrasting colors and bold lines, perhaps repeating the palm tree motif. 15. **Ink Wash Style:** Use varying shades of diluted ink to create a soft, ethereal palm tree drawing. 16. **Pointillism:** Create your palm tree entirely from tiny dots, building up tone and texture. 17. **Geometric Palm:** Construct the palm tree using only geometric shapes (triangles, rectangles, circles) for a stylized effect. 18. **Scribble Art:** Use continuous, energetic scribbles to form the shape and texture of the palm tree. 19. **Mandala Palm:** Incorporate palm tree elements into a circular, symmetrical mandala design. 20. **Collage Inspired:** Draw parts of the palm tree, then cut them out and arrange them, or draw them as if they are cut-outs. **Adding Details and Focus:** 21. **Close-up on Fronds:** Focus solely on the intricate patterns and textures of a single palm frond. 22. **Coconuts in Detail:** A detailed study of a cluster of coconuts, perhaps with one cracked open. 23. **Palm Tree Roots:** Explore the visible root system of a palm tree, especially if it's growing near water. 24. **Birds in Palm:** Add tropical birds perched on the fronds or flying around the tree. 25. **People Under Palms:** Show figures relaxing, reading, or playing beneath the shade of a palm tree, adding a human element to the scene. These ideas are just starting points. Let your imagination guide you, and don't be afraid to combine elements or invent entirely new scenarios for your palm tree drawing.Common Mistakes to Avoid in Palm Tree Drawing
As with any drawing subject, there are common pitfalls that beginners often encounter when attempting a palm tree drawing. Being aware of these can help you avoid them and improve your results significantly. * **Stiff, Straight Trunks:** One of the most frequent mistakes is drawing a perfectly straight, rigid trunk. Real palm trees almost always have a slight curve, lean, or taper. Adding this subtle organic quality makes them look much more natural. * **Unnatural Frond Placement:** Drawing fronds that all point in the same direction or are perfectly symmetrical often looks artificial. Fronds grow in a radial pattern, but they also respond to wind, gravity, and their own weight, creating varied curves and overlaps. Avoid making them look like a rigid fan. * **Lack of Depth/Shading:** A flat, unshaded palm tree will lack realism. Remember to consider your light source and apply appropriate shading to the trunk (cylindrical form) and the fronds (casting shadows on each other and the trunk). This adds volume and dimension. * **Ignoring the Base:** Often, artists focus on the trunk and fronds but neglect the base of the tree. Palm trees have a root ball or a flared base that anchors them to the ground. Failing to include this can make the tree look like it's floating. * **Over-detailing Individual Leaflets:** While detail is good, drawing every single leaflet on every frond can make the drawing look cluttered and stiff. It's more effective to suggest the mass of leaflets with quick, directional strokes, especially for distant fronds. * **Inconsistent Scale:** If you're drawing a palm tree with other elements (people, buildings), ensure the scale is consistent. A palm tree is a tall, imposing plant, and its size should reflect that in relation to its surroundings. * **Rushing the Process:** Drawing, especially something as organic as a palm tree, benefits from patience. Take your time to observe, sketch lightly, and build up your drawing layer by layer. Rushing often leads to stiff, uninspired results. By being mindful of these common errors, you can significantly elevate the quality and realism of your palm tree drawing.Practice Makes Perfect: Developing Your Palm Tree Drawing Skills
Like any skill, mastery in palm tree drawing comes with consistent practice and observation. Don't expect perfection on your first attempt; instead, embrace each drawing as a learning opportunity. * **Observe Real Palm Trees:** If you have access to real palm trees, take the time to observe them closely. Notice the variations in trunk texture, the way the fronds curve, how light hits them, and how they sway in the wind. If not, use high-quality reference photos. * **Sketch Regularly:** Dedicate a small amount of time each day or week to sketching palm trees. Quick sketches can be just as valuable as finished pieces for improving your hand-eye coordination and understanding of form. * **Experiment with Different Styles and Mediums:** Don't limit yourself to just pencil. Try drawing palm trees with ink, charcoal, pastels, or even digitally. Each medium offers a different feel and can push your creative boundaries. Experiment with the various ideas we shared earlier. * **Focus on Specific Elements:** If you're struggling with fronds, dedicate a practice session solely to drawing different types of fronds. If trunks are an issue, fill a page with various trunk textures. * **Learn from Others:** Watch drawing tutorials (like the hypothetical video tutorial mentioned earlier), study the work of other artists, and don't be afraid to copy for learning purposes (just don't claim it as your own original work). * **Enjoy the Process:** Most importantly, have fun! Drawing should be a relaxing and rewarding activity. The more you enjoy it, the more likely you are to keep practicing and improving. Remember, every line you draw is a step forward. Your unique artistic voice will emerge through consistent effort and a willingness to explore.The journey of a thousand drawings begins with a single line. We hope this comprehensive guide has demystified the art of palm tree drawing and ignited your passion for capturing these tropical icons. From understanding the basic elements of the trunk and fronds to exploring advanced shading techniques and a myriad of creative ideas, you now have the tools and knowledge to embark on your own artistic adventure. By following the simple steps and embracing continuous practice, you too can easily draw a perfect palm tree, transforming your vision into beautiful artwork.
Don't let your creativity stop here. Pick up your pencil, find a comfortable spot, and let the graceful forms of the palm tree inspire your next masterpiece. We encourage you to share your palm tree drawings with us in the comments below – we'd love to see your progress and unique interpretations! What's your favorite type of palm tree to draw, or which background setting are you most excited to try? Share your thoughts and let's inspire each other. For more drawing tips and tutorials, be sure to explore other articles on our site. Happy drawing!
Related Resources:

Detail Author:
- Name : Ms. Noelia Bogan
- Username : kunze.chase
- Email : muriel.doyle@ohara.com
- Birthdate : 1970-07-07
- Address : 9010 Fisher Mountain Alifurt, KS 60074
- Phone : 1-575-922-8234
- Company : Kunde Group
- Job : Logistician
- Bio : Suscipit unde animi molestiae sapiente reprehenderit. Quis consequatur reprehenderit ex sit reprehenderit. Rerum unde velit laborum est suscipit minus.
Socials
tiktok:
- url : https://tiktok.com/@dsawayn
- username : dsawayn
- bio : Nihil qui qui ipsum dolores qui aspernatur.
- followers : 3187
- following : 2786
instagram:
- url : https://instagram.com/danielle4529
- username : danielle4529
- bio : Et quidem sint est ut sequi. Consequatur reiciendis veniam voluptatibus velit nobis quibusdam sed.
- followers : 6630
- following : 116
