Have you ever gazed at a breathtaking mountain range and wished you could capture its grandeur on paper? The majestic peaks, the intricate textures, the play of light and shadow – it all seems so complex. However, learning how to draw a mountain is a simple and easy activity that can be a great visual tool for creating landscapes that suggest vast distances. It's a skill that opens up a world of creative possibilities, allowing you to bring dramatic depth and awe-inspiring beauty to your artwork.
This comprehensive guide is designed to demystify the art of mountain drawing, providing you with the techniques and insights needed to create stunning landscapes. Whether you're a complete novice or looking to refine your skills, we'll walk you through every step, from sketching basic shapes to adding intricate details like rocky surfaces, lush trees, and even serene lakes. Drawing mountains can be so easy if you know the right technique, and by the end of this article, you'll be equipped to draw impressive mountains in just a few steps.
Table of Contents
- Why Draw Mountains?
- Essential Tools for Your Mountain Drawing Journey
- Understanding Basic Mountain Shapes
- Step-by-Step Guide to Drawing Mountains for Beginners
- Mastering Light and Shadow Effects
- Adding Elements: Clouds, Trees, and Lakes
- Advanced Techniques for Realistic Mountain Landscapes
- Practice Makes Perfect: Ideas and Resources
Why Draw Mountains?
Mountains have captivated artists for centuries, serving as powerful symbols of permanence, majesty, and the untamed beauty of nature. For an artist, a mountain drawing can be a cornerstone of a compelling landscape, immediately conveying scale and distance. They are not just static forms; they are dynamic elements that tell a story of geological time and atmospheric conditions. As a growing child, all of us draw landscapes and scenery, mountains are a fundamental part of that artistic journey. They teach us about perspective, composition, and the subtle nuances of light and form.
- Sunnyvale Public Library
- Living Room Theater In Portland
- Towson Town Center
- Krohn Conservatory
- Slaps Bbq
Beyond their aesthetic appeal, learning how to draw mountains is a great way to learn how to implement light and shadow into your artwork. They make us learn shadow effect in drawing like few other subjects can. The dramatic contrasts between sun-drenched peaks and deep, shaded valleys provide an unparalleled opportunity to practice rendering three-dimensional forms on a two-dimensional surface. This skill is transferable to countless other drawing subjects, making mountain drawing an invaluable exercise for any aspiring artist. Moreover, the process itself can be incredibly therapeutic, offering a quiet escape into the creative flow as you meticulously craft your mountainous masterpiece.
Essential Tools for Your Mountain Drawing Journey
You don't need an elaborate art studio to begin your mountain drawing adventure. In fact, some of the most impactful drawings are created with minimal tools. Here’s a list of essentials to get you started:
- Pencils: A range of graphite pencils is ideal. An HB pencil is great for initial sketches, while a 2B or 4B can be used for darker lines and shadows. For very dark areas, an 8B or even a charcoal pencil can be effective.
- Paper: Any good quality drawing paper will do. Look for paper with a bit of "tooth" (texture) that can hold graphite well. Sketchbooks are perfect for practice.
- Eraser: A kneaded eraser is excellent for lifting graphite gently without smudging, and a plastic eraser is good for sharper corrections.
- Blender/Smudge Stick: These tools help create smooth transitions between tones and can soften harsh lines, perfect for rendering misty atmospheres or subtle shadows.
- Reference Images: While not a physical tool, having a variety of mountain photographs or even real-life views (if you're lucky enough to have them) is crucial. They provide invaluable insight into how light interacts with different terrains and how natural formations appear.
With these basic supplies, you are well-equipped to embark on your journey of drawing mountains, transforming simple lines into impressive landscapes.
Understanding Basic Mountain Shapes
Before diving into intricate details, it's vital to grasp the fundamental shapes that define mountains. This section will guide you through two common mountain shapes: simple peaks and layered mountains. Mastering these shapes will make your mountain drawings look more authentic and dynamic.
Simple Peaks: The Foundation
For beginners, starting with simple peaks is the most straightforward approach. Think of a classic triangle, but with slightly irregular sides. Mountains in nature are rarely perfect geometric shapes; they have jagged edges, gentle slopes, and sharp inclines. To sketch a simple peak:
- Begin with a base line that will serve as the ground level.
- From the base, draw two lines that converge at a point, forming a basic triangular shape.
- Now, gently break up these straight lines. Add small bumps, dips, and jagged edges along the slopes to mimic natural rock formations.
- Vary the height and width of your peaks. A landscape with mountains of different sizes is far more interesting than a uniform row.
This foundational exercise helps you get comfortable with the overall silhouette of a mountain before adding complex textures or shadows. It's the first step in learning how to sketch the entire outline of a mountain landscape.
Layered Mountains: Adding Depth
Once you're comfortable with simple peaks, you can introduce layering to create a sense of depth and distance. Layered mountains are essential for suggesting vast distances in your landscapes. This technique, often referred to as atmospheric perspective, involves drawing mountains behind one another, with those further away appearing lighter and less detailed.
- Start by drawing the mountains closest to the foreground, using darker lines and more detail.
- Behind these, draw another set of mountains. These should slightly overlap the foreground mountains, but their lines should be lighter and less defined.
- Continue this process, making each successive layer lighter and hazier. This mimics the effect of atmospheric haze, which obscures distant objects.
- Consider the "rule of thirds" or other compositional guidelines when arranging your layers to create a visually balanced scene.
This method allows you to build a sense of deep space within your mountain drawing, making your landscapes feel expansive and immersive. Within this tutorial on how to draw mountains, we will be creating a mountain drawing that is quite simple and can be used to create a set with the same method.
Step-by-Step Guide to Drawing Mountains for Beginners
Now that you understand the basic shapes, let's put it all together. Here is an easy step by step tutorial on how to draw mountains, perfect for beginners. This tutorial is regarding drawing mountains in simple and easy steps for children and beginners, making it accessible for everyone.
Sketching the Outline: From Base to Peak
The outline is the skeleton of your mountain drawing. It defines the overall form and character of your peaks. I'll show you how to sketch the mountain peaks, starting with light, confident strokes.
- Establish the Horizon Line: Lightly draw a horizontal line across your paper. This will be your horizon or the base where your mountains rise from.
- Rough Mountain Shapes: Using a light pencil (like an HB), sketch the general triangular shapes for your mountains. Don't press hard; these are just guides. Vary the heights and widths to create interest. Think about the overall silhouette you want to achieve.
- Refine the Ridges: Now, go back over your rough shapes and add jagged, uneven lines to define the mountain ridges and slopes. Mountains are rarely smooth; they have sharp angles, gentle curves, and rocky outcrops. This is where you give your mountain drawing its unique character.
- Add Overlapping Peaks: If you're creating a range, lightly sketch the outlines of mountains that appear behind the foreground ones. Remember to make these lines even lighter to suggest distance.
This initial sketching phase is about capturing the essence of the mountain's form. Don't worry about perfection; focus on natural, organic shapes.
Incorporating Rocky Details and Textures
Once the basic outline is in place, it's time to bring your mountains to life with texture. I’ll show you how to sketch the rocky details on the surface of the mountain. This is where your mountain drawing truly begins to take on a realistic appearance.
- Define Cracks and Crevices: Look at your reference images. Mountains have countless cracks, fissures, and rock faces. Use short, broken lines and small, irregular shapes to suggest these details. Focus on areas where light might catch an edge or where a shadow would deepen a crevice.
- Vary Line Weight: Use a slightly darker pencil (like a 2B) to emphasize certain lines, particularly those that define prominent rock formations or the edges of cliffs. Lighter lines can be used for more subtle textures.
- Hatching and Cross-Hatching: For areas of rough texture, use hatching (parallel lines) or cross-hatching (intersecting parallel lines). The closer the lines, the darker and more textured the area will appear. This technique is excellent for rendering rugged rock surfaces.
- Stippling (Optional): For very fine, grainy textures, you can use stippling (creating dots). This is more time-consuming but can produce a unique effect for certain rock types.
Remember that texture isn't uniform across the entire mountain. Some areas might be smoother, while others are incredibly rugged. Observing your references will guide you in applying these details effectively. This tutorial shows how to draw mountains in six steps with easy to follow illustrated examples and quick drawing instructions.
Mastering Light and Shadow Effects
Light and shadow are the soul of any drawing, especially when it comes to mountain drawing. They transform flat shapes into three-dimensional forms, giving them volume, depth, and drama. Learning how to draw mountains is a great way to learn how to implement light and shadow into your artwork. They make us learn shadow effect in drawing like few other subjects can.
The Role of Light in Mountain Drawings
Before you even pick up your pencil to shade, decide on your light source. Is the sun coming from the left, right, top, or behind the mountain? This decision dictates where highlights and shadows will fall. A consistent light source is crucial for a believable mountain drawing.
- Highlights: These are the areas directly hit by the light source. Keep these areas the lightest, or even leave them as the white of the paper. Highlights often appear on the edges of peaks and ridges facing the light.
- Mid-tones: These are the areas that receive some light but are not directly illuminated. They form the bulk of the mountain's surface.
- Reflected Light: Sometimes, light bounces off other surfaces (like snow or a lake) and illuminates a shaded area. This subtle effect can add realism and prevent shadows from looking flat.
Understanding how light behaves on uneven surfaces is key. The angle of the sun will dramatically change the appearance of your mountain, from a brightly lit peak at midday to a silhouette at sunset.
Creating Depth with Shadows
Shadows are what give your mountain drawing its three-dimensionality. They define contours, reveal hidden crevices, and separate one peak from another. I’ll show you how to sketch the shadows effectively.
- Form Shadows: These are the shadows that fall on the mountain itself, indicating its curves and depressions. Areas facing away from the light source will be darker. Use a softer pencil (like a 4B or 6B) and build up layers of graphite to create deep, rich shadows.
- Cast Shadows: These are shadows cast by one part of the mountain onto another part, or by the mountain onto the ground below. Cast shadows tend to have sharper edges near the object casting them and become softer as they extend further away.
- Atmospheric Perspective and Shadows: Remember that shadows on distant mountains will appear lighter and less intense due to atmospheric haze. This reinforces the sense of depth you established with layering.
- Varying Shadow Intensity: Not all shadows are equally dark. Shadows in deep crevices will be darker than those on a gently sloping side. Observe your reference images carefully to capture these nuances.
By skillfully manipulating light and shadow, you can transform a simple outline into a vibrant, volumetric mountain drawing that truly pops off the page.
Adding Elements: Clouds, Trees, and Lakes
A mountain drawing rarely exists in isolation. Adding surrounding elements like clouds, trees, and lakes can significantly enhance the narrative and realism of your landscape. I’ll show you how to sketch these elements to complement your majestic peaks.
- Clouds in the Sky: Clouds add drama and context to your mountain scene. They can be wispy and high, suggesting clear weather, or heavy and low, hinting at an impending storm. When drawing clouds, use soft, undulating lines. Remember that clouds also have light and shadow, and they can cast shadows on the mountains below. The clouds in the sky should complement, not overpower, your mountain drawing.
- Trees and Vegetation: Trees add scale and texture to the base or lower slopes of your mountains. They can be drawn as simple clusters of shapes for distant forests or with more detail for individual trees in the foreground. Vary the size and type of trees to add interest. Coniferous trees are often found in mountainous regions and can be represented with triangular or conical shapes.
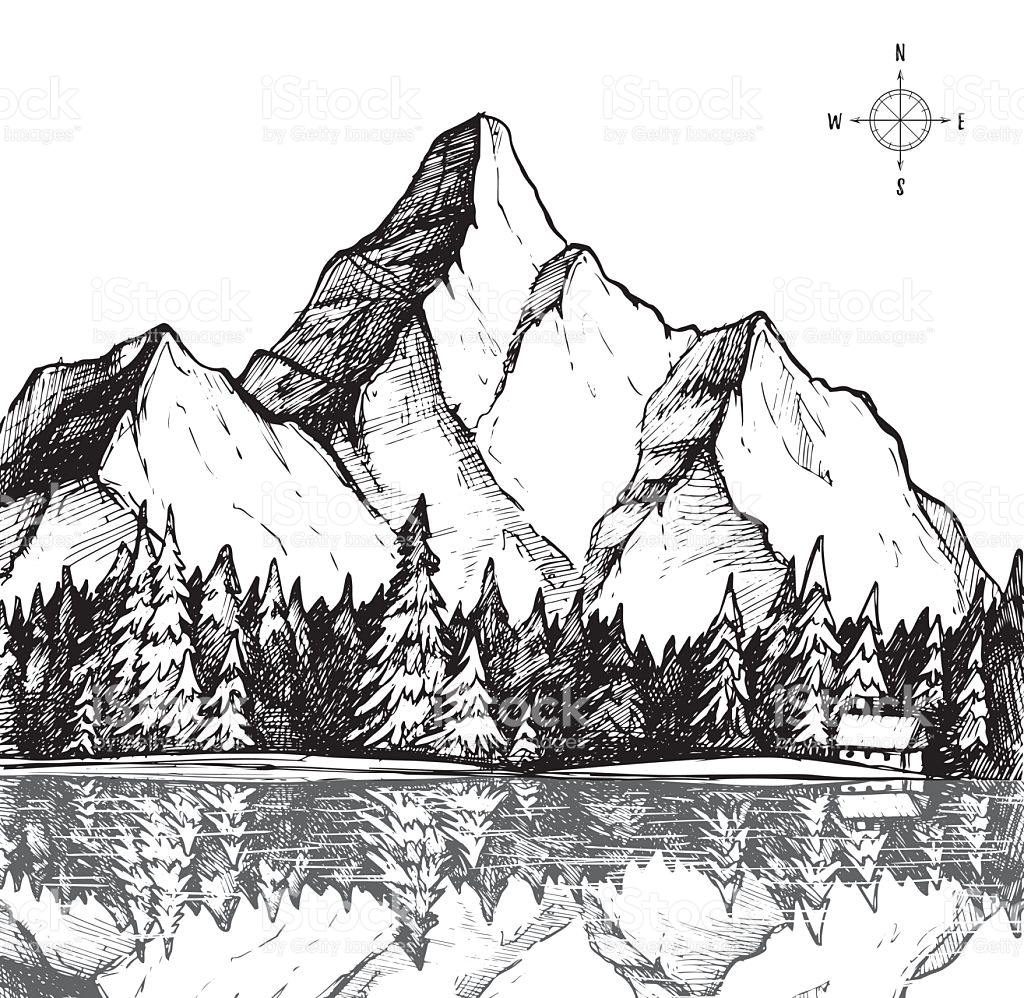
- A Beautiful Lake: A lake at the foot of a mountain range can create a stunning reflection, doubling the visual impact of your mountain drawing. To draw a lake, create a simple, organic shape at the base of your mountains. For reflections, mirror the shapes of the mountains and sky in the water, but make them slightly distorted and less defined. Add subtle ripples or highlights to suggest the water's surface.
These elements are not just fillers; they are integral parts of the ecosystem and can greatly enhance the story your mountain drawing tells. They help create a cohesive and believable landscape.
Advanced Techniques for Realistic Mountain Landscapes
Once you've mastered the basics, you can explore more advanced techniques to bring even greater realism and depth to your mountain drawing. Follow simple techniques to create realistic mountain landscapes with depth and texture.
- Atmospheric Perspective Refinement: Beyond just making distant objects lighter, atmospheric perspective also affects color and detail. Distant mountains appear bluer or grayer, and their details become increasingly blurred. Practice this gradient of detail and tone to truly convey vast distances.
- Geological Formations: Research different types of mountain formations (e.g., volcanic, folded, fault-block) and try to incorporate their characteristic shapes and patterns into your drawings. This adds a layer of authenticity.
- Snow and Ice: If drawing snow-capped mountains, pay close attention to how snow accumulates on peaks and in crevices. Snow isn't just white; it has shadows and can reflect the color of the sky. Use subtle shading to show its contours.
- Weather Effects: Experiment with drawing mountains in different weather conditions – misty, rainy, or under a dramatic sunset. These effects require careful manipulation of values and edges to convey the mood.
- Compositional Variety: Don't always draw mountains head-on. Experiment with different viewpoints – from a valley looking up, from a higher vantage point looking down, or with a winding river leading the eye towards the peaks.
These techniques push your mountain drawing beyond simple representation, allowing you to create truly evocative and professional-looking landscapes. Mastering these shapes will make your mountain drawings look more impressive.
Practice Makes Perfect: Ideas and Resources
The key to improving any artistic skill, including mountain drawing, is consistent practice. The more you draw, the better you become at observing, interpreting, and rendering the world around you. Learn how to draw a mountain with these 25 easy mountain drawing ideas with step by step simple sketch outline, printables and coloring pages.
- Daily Sketching: Dedicate a few minutes each day to sketching mountains. Even quick 5-minute sketches can help you refine your understanding of form and proportion.
- Use Diverse References: Don't stick to just one type of mountain. Look at photos of the Alps, the Himalayas, the Rockies, or local hills. Each range has unique characteristics that will challenge and expand your drawing skills.
- Break Down Complex Scenes: If a reference photo seems overwhelming, break it down into simpler shapes first. Focus on the main masses before adding details.
- Experiment with Mediums: While this guide focuses on pencil, try drawing mountains with charcoal, ink, pastels, or even digital tools. Each medium offers different possibilities for texture and tone.
- Download Free Resources: Many websites offer free art journey guides for beginners, printable outlines, and coloring pages that can serve as excellent practice material. Utilize these resources to get started quickly.
- Join Online Communities: Share your mountain drawings with online art communities. Feedback from peers can be incredibly valuable for growth.
Remember, every artist starts somewhere. Here is an easy and step by step tutorial for how to draw mountains for kids and beginners. Embrace the learning process, enjoy the journey, and watch as your mountain drawing skills ascend to new heights.
Conclusion
From the foundational strokes of simple peaks to the intricate dance of light and shadow, we've explored the comprehensive journey of mountain drawing. We've seen how a mountain drawing can be a powerful visual tool, creating landscapes that suggest vast distances and evoke a sense of awe. By understanding basic shapes, mastering techniques for rocky details, and expertly applying light and shadow, you can transform a blank page into a breathtaking mountain scene. This tutorial has shown you how to draw impressive mountains in just a few steps, proving that drawing mountains can be so easy if you know the right technique.
The beauty of art lies in its accessibility, and with the guidance provided, you are now equipped to embark on your own artistic adventures. Don't hesitate to download your free art journey guide for beginners and begin practicing. The world of mountain drawing is expansive and rewarding, offering endless opportunities for creativity and self-expression. We encourage you to pick up your pencil, share your majestic creations in the comments below, and explore other drawing tutorials on our site to further hone your skills. Happy drawing!
Related Resources:


Detail Author:
- Name : Emanuel Douglas
- Username : yundt.urban
- Email : cbruen@hotmail.com
- Birthdate : 1986-03-29
- Address : 47525 Metz Isle Suite 075 Ashaland, IN 18383
- Phone : 1-262-464-9566
- Company : Homenick, Considine and Simonis
- Job : Fish Hatchery Manager
- Bio : Velit non ut quae possimus id laudantium id ipsa. Natus porro quis saepe iure. Omnis et corrupti expedita sequi.
Socials
linkedin:
- url : https://linkedin.com/in/amani_zieme
- username : amani_zieme
- bio : Possimus deserunt minima officiis explicabo.
- followers : 3107
- following : 1083
tiktok:
- url : https://tiktok.com/@amani.zieme
- username : amani.zieme
- bio : Eligendi omnis dolor corporis velit. Aut et odit aliquam porro.
- followers : 1625
- following : 2378
instagram:
- url : https://instagram.com/amani_official
- username : amani_official
- bio : Sed officia quaerat odit. Est tenetur qui possimus reiciendis. In iure sunt neque vitae.
- followers : 1510
- following : 2181
twitter:
- url : https://twitter.com/zieme2011
- username : zieme2011
- bio : Nihil praesentium nulla illo reiciendis. Itaque nisi esse blanditiis omnis accusantium. Maiores quis quaerat dolor ut.
- followers : 159
- following : 2657
facebook:
- url : https://facebook.com/amani8391
- username : amani8391
- bio : Eos inventore consequatur commodi.
- followers : 4474
- following : 1373
