**Have you ever found yourself captivated by the chilling, iconic visage of Ghostface from the *Scream* film series and wished you could bring that terrifying presence to life on paper?** This guide is your ultimate companion to mastering the art of **ghost face drawing**, breaking down the intricate details of this legendary horror villain into manageable, step-by-step instructions. Whether you're a budding artist or someone looking to refine their skills, you'll discover the secrets to capturing every shadow and contour of this unforgettable character.
The allure of Ghostface isn't just in the scares; it's in the design – a deceptively simple yet profoundly effective mask that has become synonymous with modern horror. Learning to draw Ghostface is more than just replicating a picture; it's about understanding form, light, and shadow to evoke the same sense of dread and mystery that the character embodies on screen. From basic shapes to advanced shading techniques, prepare to unleash your inner artist and create a truly haunting piece of art.
Table of Contents
- The Enduring Legacy of Ghostface: An Icon of Horror
- Essential Tools for Your Ghostface Drawing Journey
- Ghostface Drawing for Beginners: Simple Shapes and Shading
- Advanced Techniques for a Realistic Ghostface Drawing
- Capturing the Mood: Expression and Atmosphere in Your Art
- Exploring Different Styles: From Cartoons to Hyperrealism
- Beyond the Mask: Drawing Ghostface's Cloak and Knife
- Showcasing Your Ghostface Art: Community and Inspiration
- Common Mistakes to Avoid When Drawing Ghostface
- Conclusion: Unleash Your Inner Artist
The Enduring Legacy of Ghostface: An Icon of Horror
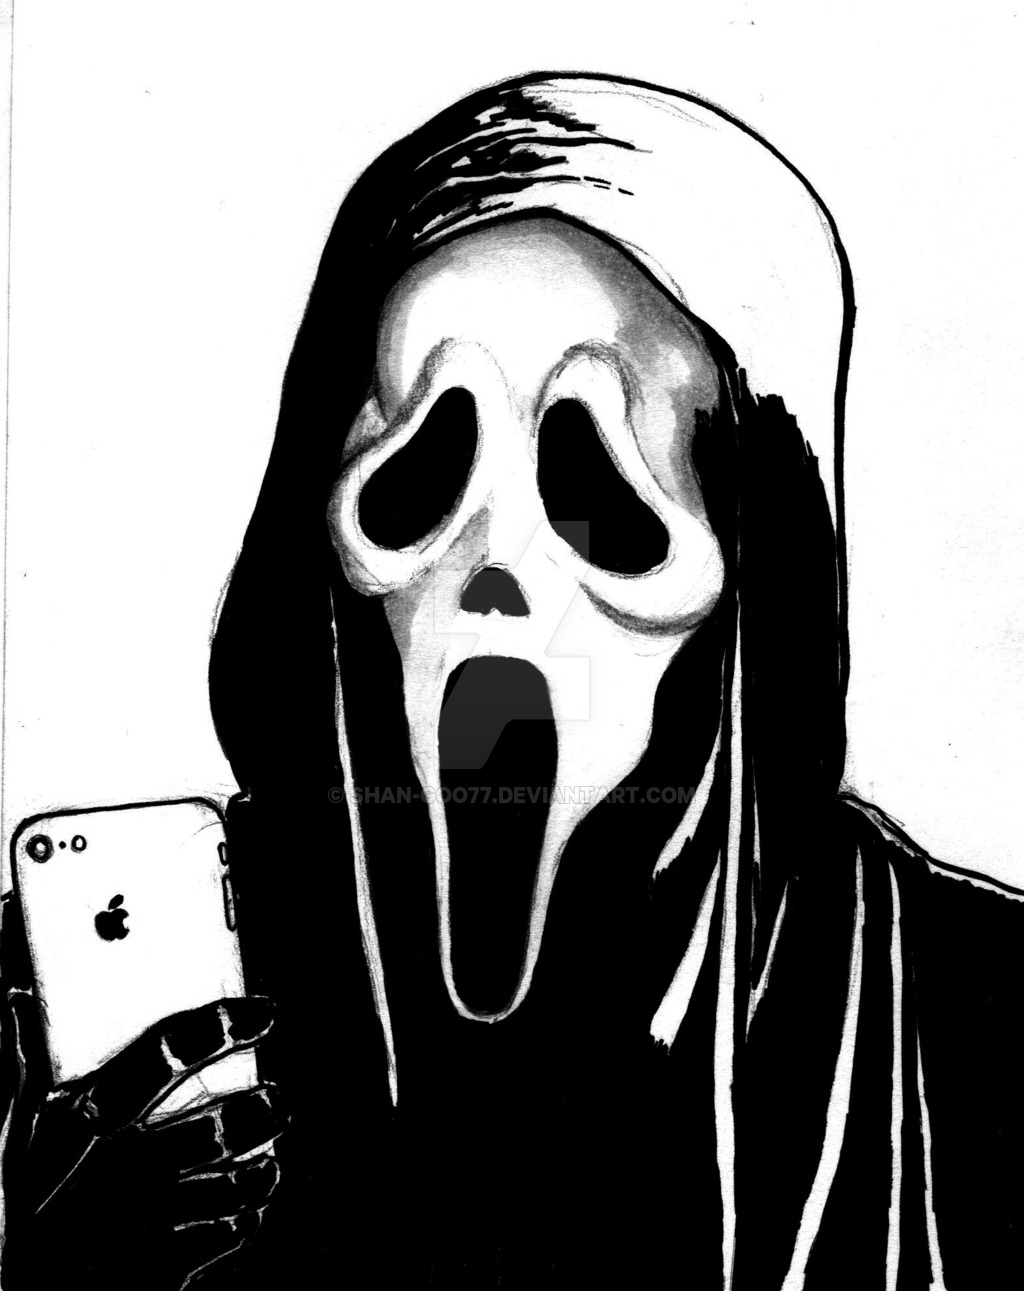
Ghostface isn't just a character; it's a phenomenon. The main villainous entity of the *Scream* film series, Ghostface features a black hood and cloak with a jagged base and a white rubber mask resembling a ghost. This distinctive appearance, coupled with the character's meta-commentary on horror tropes, has cemented its place in pop culture history. Understanding the character's impact is crucial for anyone attempting a Ghostface drawing, as it helps infuse your art with the very essence of what makes this figure so terrifyingly compelling.
The Birth of a Slasher Legend
The original Ghostface mask was discovered by Wes Craven's production team in a house during pre-production for the first *Scream* film. It was a mass-produced "Fun World" Halloween costume, and its simple yet unsettling design immediately struck a chord. This accidental find became one of horror's most recognizable faces, proving that sometimes, the most iconic designs are born from unexpected places. The mask's generic, almost childlike quality, combined with its stretched, screaming expression, creates a chilling paradox that makes it universally unsettling. This history is vital when approaching your Ghostface drawing, as it highlights the simplicity that underpins its enduring horror.
| Attribute | Description |
|---|---|
| Identity | Multiple killers throughout the series, adopting the Ghostface persona. |
| Signature Attire | Black hooded robe with jagged edges, white rubber "ghost" mask. |
| Weapon of Choice | Hunting knife (Buck 120 or similar). |
| Modus Operandi | Phone calls, psychological torment, brutal stabbings, knowledge of horror movie tropes. |
| First Appearance | Scream (1996) |
| Iconic Line | "What's your favorite scary movie?" |
Why Ghostface Resonates with Artists
Ghostface's appeal to artists lies in its stark simplicity and the profound psychological impact it carries. The mask, with its minimal features, offers a blank canvas for interpretation. Artists can play with light and shadow to create varying degrees of menace, from subtle unease to outright terror. The character's anonymity allows for a projection of fears, making a Ghostface drawing a powerful exercise in capturing abstract dread. It's a design that encourages exploration of depth, texture, and the unsettling power of negative space.
Essential Tools for Your Ghostface Drawing Journey
Before you dive into the specifics of how to draw Ghostface, gathering the right tools is essential. You don't need an expensive art studio; even basic supplies can yield fantastic results.
- Pencils: A range of graphite pencils (HB, 2B, 4B, 6B) will allow you to create different values, from light outlines to deep shadows. HB is great for initial sketches, while softer leads (B series) are perfect for shading.
- Paper: Choose drawing paper with a bit of tooth (texture) that can hold graphite well. Standard sketch paper or Bristol board works perfectly.
- Eraser: A kneaded eraser is invaluable for lifting graphite gently without smudging, and a regular plastic eraser for precise clean-ups.
- Blending Tools: A blending stump (tortillon) or even a cotton swab can help you smooth out your shading and create seamless transitions.
- Reference Images: Having multiple reference images of Ghostface from different angles and lighting conditions is crucial. Look for official movie stills, fan art, and even photographs of the actual mask.
- Optional: Charcoal for deeper blacks, white gel pen for highlights, or even digital drawing tablets if you prefer a digital medium.
Ghostface Drawing for Beginners: Simple Shapes and Shading
This guide is perfect for beginners who want to learn to draw Ghostface. I'll teach you the simple method of drawing using easy-to-follow step-by-step instructions. Kids and beginners alike can now draw a great Scream mask. The key to any good drawing, especially a Ghostface drawing, is starting with basic shapes.
Deconstructing the Scream Mask: Basic Geometry
Learn to draw the Scream mask using simple shapes & shading. The Ghostface mask, despite its terrifying effect, is fundamentally composed of very simple geometric forms.
- Start with an Oval: Begin by lightly sketching a large oval for the basic head shape. This will be the foundation of your Ghostface mask.
- Divide for Features: Draw a vertical line down the center of the oval and a horizontal line across the middle. These guidelines will help you place the eyes, nose, and mouth symmetrically.
- Eyes: The eyes are two slightly elongated, almond-shaped holes. Place them on the horizontal guideline, equidistant from the central vertical line. Remember, they are dark voids.
- Nose: The nose on the Ghostface mask is a small, inverted triangle or a narrow, elongated diamond shape, pointing downwards. It sits just below the horizontal guideline, centered.
- Mouth: This is the most distinctive feature. It's a large, elongated, almost teardrop-shaped opening that stretches wide, creating the "scream" effect. It should start relatively narrow near the nose and widen considerably as it descends, curving slightly at the bottom. Think of it as a distorted, elongated 'U' shape.
- Refine the Outline: Once the features are placed, refine the outer shape of the mask. It's not a perfect oval; it's slightly narrower at the chin and subtly wider at the forehead, with a gentle curve.
The Power of Shading: Adding Depth to Your Ghostface
Shading is where your Ghostface drawing truly comes alive, transforming flat shapes into a three-dimensional, menacing figure. The white mask of Ghostface, while seemingly simple, relies heavily on subtle shadows to define its contours and express its haunting allure.
- Light Source: First, decide where your light source is coming from. This will dictate where the shadows fall. For a classic eerie look, imagine a single light source from above or slightly to the side.
- Core Shadows: Apply soft, gradual shading to the areas that recede, such as around the eye sockets, under the nose, and within the deep creases of the mouth. Use a lighter pencil (e.g., 2B) for initial layers.
- Cast Shadows: The mask has subtle indentations that cast shadows. Pay attention to the slight shadow cast by the nose shape onto the area below it, and the shadows within the folds of the screaming mouth.
- Form Shadows: Even on a white surface, form shadows define the curves of the mask. The sides of the mask will be slightly darker than the front, indicating its rounded shape.
- Deep Blacks: The eye and mouth openings are crucial for the Ghostface drawing's impact. Fill these areas with the darkest black you can achieve (using a 6B pencil or charcoal) to create a sense of infinite void. This contrast against the white mask is key.
- Highlights: Leave small areas of the paper untouched or use a white gel pen to indicate specular highlights where the light directly hits the mask's surface, giving it a subtle sheen.
- Blending: Use a blending stump to smooth out your shading, creating seamless transitions between light and dark. This will give your Ghostface drawing a polished, professional look.
Advanced Techniques for a Realistic Ghostface Drawing
Once you've mastered the basics, you can elevate your Ghostface drawing by incorporating more advanced techniques. This involves paying closer attention to subtle textures, nuanced lighting, and the overall atmosphere.
- Subtle Textures: The Ghostface mask is made of rubber. While it appears smooth, there are often subtle imperfections, slight wrinkles, or a faint matte texture. Use very light, short strokes or stippling to suggest these without overdoing it.
- Reflected Light: Look for areas where light bounces off surrounding surfaces and subtly illuminates shadowed areas. This adds realism and prevents shadows from looking flat. For instance, the underside of the chin might catch some reflected light from the cloak.
- Edge Control: Vary the sharpness of your edges. The crisp edges of the mask's cutouts (eyes, nose, mouth) should contrast with the softer, more gradual edges of the mask's overall form. This creates visual interest and depth.
- Atmospheric Perspective: If you're drawing Ghostface in a scene, consider how distance affects clarity. Objects further away appear less detailed and lighter in value.
- Focal Point: Decide what you want the viewer to focus on. Often, it's the eyes or the mouth. Enhance the contrast and detail in these areas to draw the viewer's gaze.
Capturing the Mood: Expression and Atmosphere in Your Art
A Ghostface drawing isn't just about anatomical accuracy; it's about conveying the character's unsettling presence. The mask itself is static, but the way you render it, along with its surroundings, can evoke a powerful sense of dread, mystery, or even despair.
- Lighting is Key: Dramatic lighting is Ghostface's best friend. Backlighting can create a menacing silhouette. Side lighting can emphasize the contours of the mask and create deep, unsettling shadows. Consider a single, harsh light source for maximum impact.
- Composition: How you frame Ghostface in your drawing matters. A close-up can intensify the personal horror, while placing Ghostface in a wider shot (e.g., in a doorway or at the end of a dark hallway) can emphasize isolation and vulnerability.
- Background Elements: Even a simple, blurred background can contribute to the mood. Think about subtle hints of a dark room, a flickering light, or a distant, indistinct shape to add to the atmosphere.
- Perspective: Drawing Ghostface from a low angle can make the figure appear more imposing and threatening, while a high angle can make them seem more vulnerable (though this is less common for Ghostface).
Exploring Different Styles: From Cartoons to Hyperrealism
While a realistic Ghostface drawing is often the goal, don't be afraid to experiment with different artistic styles. The versatility of the Ghostface design allows for a wide range of interpretations.
- Cartoon/Chibi Style: Simplify the features, exaggerate certain elements (like the eyes or mouth), and use bold outlines. This can create a fun, yet still recognizable, version of Ghostface. Free, printable Ghostface from Scream coloring page for kids often uses this simplified approach.
- Comic Book Style: Focus on strong line work, dynamic poses, and dramatic shadows. Use cross-hatching for texture and depth.
- Abstract/Expressionistic: Experiment with distorted forms, unconventional colors, and aggressive brushstrokes (if painting) to convey the psychological horror of Ghostface rather than a literal representation.
- Hyperrealism: For the truly dedicated, hyperrealism involves meticulous attention to every detail – the subtle sheen of the rubber, the faint textures, the precise way light falls and reflects. This requires patience and a keen eye for observation.
Beyond the Mask: Drawing Ghostface's Cloak and Knife
While the mask is undeniably the focal point, a complete Ghostface drawing often includes the iconic black cloak and the menacing hunting knife. These elements add to the character's silhouette and overall intimidation factor.
- The Cloak: Ghostface's cloak is characterized by its deep black color and jagged, tattered hem. When drawing it, focus on conveying the folds and drapes of the fabric. Use deep, rich blacks for the shadows and subtle lighter tones to indicate the fabric's movement and form. The jagged base adds to its unsettling appearance, suggesting wear and tear from countless terrifying encounters.
- The Knife: The Buck 120 hunting knife is Ghostface's signature weapon. When drawing it, pay attention to its distinct shape: a long, slender blade with a prominent guard and a dark handle. Use highlights on the blade to suggest its metallic sheen and sharpness. The knife should feel like an extension of Ghostface's menacing presence.
- Body Language: Even without a visible face, Ghostface's body language in the cloak can convey a lot. A hunched posture, a slight lean, or the way the cloak billows can add to the sense of threat or movement.
Showcasing Your Ghostface Art: Community and Inspiration
Once you've completed your Ghostface drawing, don't keep it to yourself! Sharing your art is a great way to get feedback, connect with other artists, and find inspiration for your next piece.
- Online Art Communities: Platforms like DeviantArt, ArtStation, and Instagram are fantastic places to share your work. Use relevant hashtags like #ghostfacedrawing, #screamart, #horrordrawing to reach a wider audience.
- Pinterest: Find and save ideas about Ghostface drawing on Pinterest. It's also a great place to discover other artists' interpretations and gather inspiration for your next project. Are you looking for the best Ghostface drawing for your personal blogs, projects, or designs? Then Clipartmag is the place just for you. They have collected 38+ original and carefully picked Ghostface drawings.
- Fan Groups: Join *Scream* fan groups on social media. Fans of the franchise are often eager to see and appreciate fan art.
- Art Challenges: Participate in drawing challenges (like Inktober, if it's October!) or horror-themed art prompts. This can push your creativity and help you develop your skills further.
Common Mistakes to Avoid When Drawing Ghostface
Even experienced artists make mistakes. Being aware of common pitfalls can help you avoid them and improve your Ghostface drawing significantly.
- Lack of Symmetry: The Ghostface mask is highly symmetrical. Even slight deviations can make it look "off." Use your initial guidelines diligently.
- Flat Shading: Not enough contrast between lights and darks will make your mask look flat and unconvincing. Push your darks and preserve your lights.
- Incorrect Proportions: The size and placement of the eyes, nose, and especially the mouth relative to each other are crucial. Refer to your reference images constantly.
- Over-texturing: While subtle texture is good, overdoing it can make the smooth rubber mask look rough or dirty. Less is often more.
- Ignoring the Hood: The black hood frames the mask and is integral to the Ghostface silhouette. Don't neglect its form and shadows, as it helps ground the mask.
- Rushing: Art takes time. Don't rush the process, especially when it comes to refining details and blending. Patience is key to a polished Ghostface drawing.
Conclusion: Unleash Your Inner Artist
Mastering the haunting allure of the *Scream* series' antagonist with our guide on how to draw Ghostface, detailing every shadow and contour, is a rewarding artistic endeavor. From understanding the character's iconic design to employing simple shapes and advanced shading techniques, you now have the tools to create your own terrifyingly beautiful Ghostface drawing. Remember, practice is paramount. The more you draw, the more confident and skilled you will become.
It's Halloween today, so let's learn how to draw Ghostface from Scream! I'll teach you the simple method of drawing using easy-to-follow step-by-step instructions. Now that you've explored the depths of Ghostface drawing, we encourage you to pick up your pencils and start creating. Share your creations with us in the comments below – we'd love to see your unique interpretations of this horror legend! Don't forget to explore our other drawing tutorials for more artistic inspiration. Happy drawing, and may your art be as chilling as Ghostface himself!
Related Resources:


Detail Author:
- Name : Jules Kohler
- Username : kmarks
- Email : lhills@gmail.com
- Birthdate : 2002-08-24
- Address : 74732 Blanda Mountains Maurineshire, VA 91770
- Phone : 580.703.2178
- Company : Hagenes-Homenick
- Job : Coaches and Scout
- Bio : Voluptatem magnam incidunt culpa at. Ipsa eum aut harum occaecati incidunt. Sint possimus molestiae sapiente ipsum. Reprehenderit eos impedit reiciendis vel et. Magnam consectetur ut eum enim ex.
Socials
facebook:
- url : https://facebook.com/arjun9087
- username : arjun9087
- bio : Delectus rerum eaque rerum occaecati. Quae nobis corrupti neque et aut.
- followers : 3704
- following : 1828
tiktok:
- url : https://tiktok.com/@aprice
- username : aprice
- bio : Enim est consequatur ut minima asperiores a optio.
- followers : 2739
- following : 495
linkedin:
- url : https://linkedin.com/in/arjun5939
- username : arjun5939
- bio : Autem voluptatem harum iure hic.
- followers : 4296
- following : 354
