Are you looking for a decor element to take your next celebration over the top? A stunning balloon arch is often the answer, transforming any space into a festive wonderland. Far from being a complex task reserved for professional decorators, creating your own balloon arch is easier than you think, offering a fantastic DIY opportunity to add a personalized touch to your event.
Whether you’re hosting a birthday party, welcoming a new baby, celebrating a bridal shower, or organizing any other significant gathering, a well-crafted balloon arch provides an instant visual wow factor. This comprehensive guide will walk you through everything you need to know, from choosing the right style to mastering the techniques, ensuring your DIY balloon arch becomes the talk of the party.
Table of Contents
- The Unforgettable Impact of a Balloon Arch
- Understanding Balloon Arch Styles and Types
- Is DIY Balloon Arch Creation Easier Than You Think?
- Essential Tools and Materials for Your DIY Balloon Arch
- Step-by-Step Guide: How to Make a Stunning Balloon Arch
- Tips for a Professional-Looking Balloon Arch
- Troubleshooting Common Balloon Arch Challenges
- Beyond the Arch: Creative Uses for Balloons
- Conclusion: Elevate Your Celebrations with a DIY Balloon Arch
The Unforgettable Impact of a Balloon Arch
Why a Balloon Arch?
In the realm of party decorations, few elements command attention quite like a well-executed balloon arch. It’s not just a collection of inflated spheres; it's a statement piece, a focal point that instantly elevates the ambiance of any event. Imagine walking into a venue where a vibrant, whimsical, or elegant arch frames an entrance, a dessert table, or a photo booth. This visual spectacle instantly signals that something special is happening, setting a celebratory tone from the moment guests arrive.
- Terry Costa
- Rickey Stokes News Rickey Stokes News
- Mountain High Outfitters
- Yoseka Stationery
- Nottingham Forest Players
The appeal of a balloon arch lies in its ability to transform an ordinary space into an extraordinary one. It creates a sense of grandeur and excitement, making every moment feel more memorable. From a practical standpoint, it’s an incredibly versatile decor item. It can define a specific area, guide guests' attention, or simply serve as a stunning backdrop for countless photographs. The sheer volume and color of balloons arranged in an arch create a dynamic and joyful atmosphere that is hard to replicate with other decorations. It truly packs a lot of visual wow factor!
Versatility for Every Occasion
One of the most compelling aspects of a balloon arch is its incredible adaptability to various themes and occasions. Whether you’re hosting a birthday party, welcoming a new baby, celebrating a bridal shower, or hosting a corporate event, a balloon arch can be customized to fit perfectly. The choice of colors, sizes, and even the type of balloons (matte, metallic, clear, confetti-filled) allows for endless creative possibilities. For a child's birthday, a bright, multi-colored arch might be ideal, perhaps incorporating character balloons. For a sophisticated bridal shower, a delicate arch in pastel shades or elegant whites and golds would be more appropriate.
Consider a graduation ceremony where an arch in school colors provides a celebratory pathway for graduates, or a baby shower where soft blues, pinks, or yellows create a tender welcome. Even for holidays like Halloween or Christmas, a balloon arch can be designed with thematic colors and elements to enhance the festive spirit. Its ability to be tailored to specific events, combined with its undeniable visual appeal, makes the balloon arch a go-to choice for event planners and DIY enthusiasts alike. It’s a decor solution that consistently delivers impact, regardless of the celebration.
Understanding Balloon Arch Styles and Types
Before diving into the creation process, it’s essential to understand the different styles and methods available for making a balloon arch. Your choice will largely depend on the aesthetic you're aiming for, the size of your space, and your budget. To make a balloon arch, there are a few different methods, depending on the design you’re hoping to achieve.
Classic vs. Organic Styles
The world of balloon arches broadly categorizes into two main styles: classic and organic. Each offers a distinct aesthetic and requires a slightly different approach to achieve.
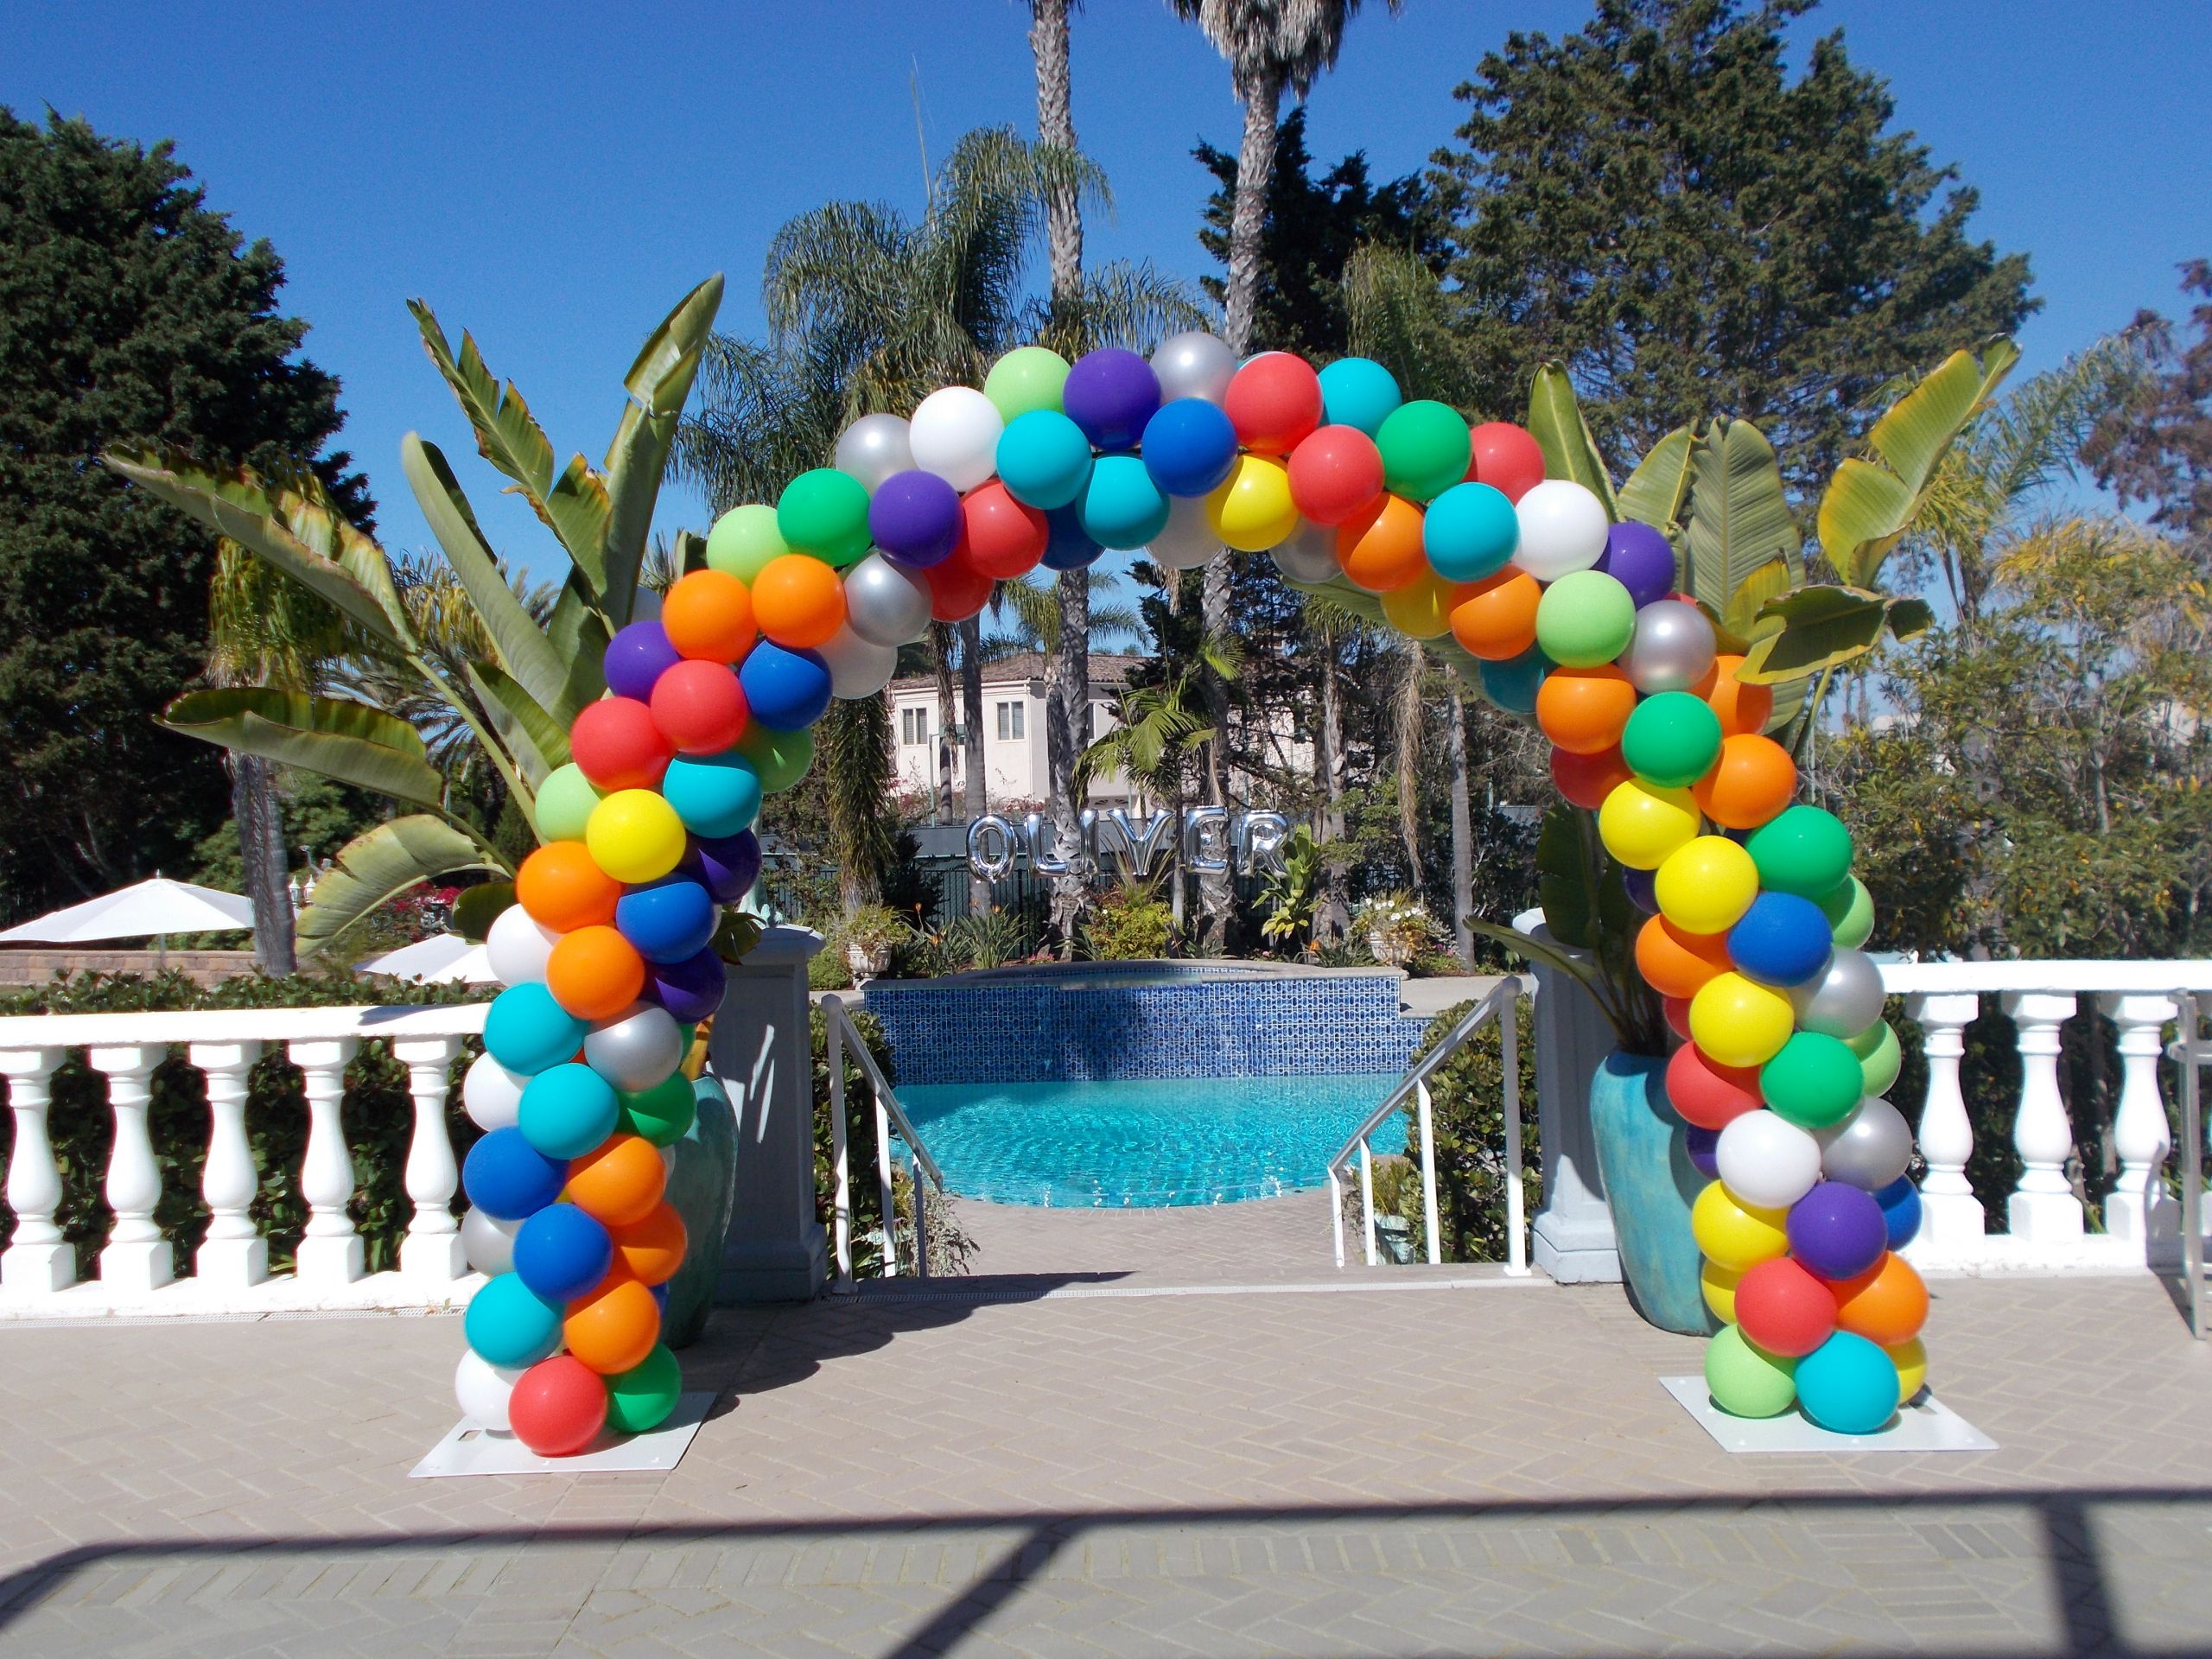
- Classic Balloon Arch: This is what most people envision when they think of a balloon arch. It typically features balloons of uniform size, arranged symmetrically and tightly packed along a frame, creating a neat, structured, and often rainbow-like appearance. These arches are perfect for grand openings, formal events, or anywhere a clean, traditional look is desired. They often follow a predictable pattern, creating a sense of order and precision. Balloon arches are available to order online in four of the most popular sizes and styles, often including classic designs.
- Organic Balloon Arch (or Garland): This style has gained immense popularity in recent years due to its whimsical and naturalistic appeal. Organic arches feature balloons of varying sizes (from tiny 5-inch balloons to giant 36-inch ones), arranged in a more free-flowing, asymmetrical manner. The beauty of the organic style lies in its seemingly effortless, flowing form, mimicking natural elements like clouds or vines. Balloons are clustered in different sizes, creating depth and texture, often with pops of contrasting colors or metallics. Balloon arches made in the organic style are also available either online or by special request, reflecting their rising demand for trendy events.
Frame vs. Free-Standing
Beyond the aesthetic style, the structural support of your balloon arch is another critical consideration:
- Frame-Based Arch: This method involves securing balloons onto a rigid frame, typically made of PVC pipe, metal, or even a sturdy hula hoop for smaller arches. The frame provides a stable structure, allowing for precise shaping and ensuring the arch maintains its form throughout the event. Frame-based arches are excellent for outdoor events where wind might be a factor, or for large, elaborate installations that need significant support. They can be anchored to the ground or weighted down for stability. You can choose to make a balloon arch by securing balloons onto a frame, providing a robust and reliable structure.
- Free-Standing (or Garland-Style) Arch: This method, often associated with organic designs, involves stringing balloons onto a fishing line, string, or specialized balloon tape. The resulting garland can then be draped, hung, or affixed to walls, doorways, or existing structures to create an arch-like effect without a dedicated, rigid frame. While more flexible and often easier for beginners, free-standing arches require careful planning for attachment points and may not hold their shape as rigidly as framed arches, especially in open spaces. However, they offer immense creative freedom for unique installations. You can choose to make a balloon arch by securing balloons onto a string or tape, offering a more flexible and often simpler setup.
Understanding these fundamental differences will help you select the best approach for your specific event and skill level. Both styles and methods can result in a truly stunning balloon arch.
Is DIY Balloon Arch Creation Easier Than You Think?
For many, the idea of creating a grand balloon arch conjures images of complex tools, hours of painstaking work, and a high likelihood of failure. The good news? It's easier than you think! The perception that balloon arches are solely the domain of professional decorators is a common misconception. While large-scale, intricate installations certainly benefit from expert hands, a beautiful and impressive balloon arch for your home party or small event is entirely within the grasp of the average DIY enthusiast.
The secret lies in understanding the basic techniques and having the right materials. Modern balloon decorating tools and readily available kits have democratized the process, making it accessible to anyone with a bit of patience and creativity. You don't need specialized training or expensive equipment to achieve a professional-looking result. The most common methods, such as using balloon decorating strip or tying balloons in clusters, are surprisingly straightforward once you get the hang of them.
It’s easier than it looks and packs a lot of visual wow factor! The satisfaction of creating something so visually impactful with your own hands is immense. Plus, the cost savings compared to hiring a professional can be significant, allowing you to allocate your budget to other party elements. This guide aims to demystify the process, breaking it down into manageable steps that prove just how achievable a DIY balloon arch truly is. Find out how to make a balloon arch with our easy guide, and you'll quickly realize that this impressive party statement is well within your capabilities. A balloon arch makes a pretty party statement so make a DIY balloon garland today!
Essential Tools and Materials for Your DIY Balloon Arch
Before you begin, gathering all your materials and tools will ensure a smooth and efficient creation process. The right supplies make all the difference in achieving a sturdy and visually appealing balloon arch.
1. Balloons:
- Variety of Sizes: For an organic look, aim for a mix of 5-inch, 10-inch, 12-inch, and even 18-inch or 24-inch balloons. For a classic arch, consistent sizes (e.g., all 10-inch or 12-inch) work best.
- Colors: Choose colors that match your party theme. Consider matte, metallic, chrome, or clear confetti balloons for added texture and sparkle.
- Quality: Invest in high-quality latex balloons. Cheaper balloons are more prone to popping and may not hold air as long. Brands like Qualatex or Tuftex are often recommended by professionals for their durability and consistent color.
2. Inflation Tools:
- Electric Balloon Pump: This is a non-negotiable item for any serious balloon arch project. Inflating dozens, or even hundreds, of balloons by mouth or with a hand pump is incredibly time-consuming and exhausting. An electric pump will save you hours and lung capacity.
- Hand Pump (Optional): Useful for inflating smaller 5-inch balloons or for quick touch-ups.
3. Assembly Mechanism:
- Balloon Decorating Strip (Balloon Tape): This is a clear plastic strip with small holes that allow you to easily insert and secure balloon knots. It's the most popular and easiest method for creating garlands and arches.
- Fishing Line or Strong String: An alternative to balloon strip, especially for more free-form or organic designs where you'll be tying balloon clusters directly onto the line.
- Balloon Tying Tool (Optional but Recommended): A small plastic tool that helps tie balloon knots, saving your fingers from soreness, especially when dealing with many balloons.
4. Adhesives and Fasteners:
- Balloon Glue Dots (or Low-Temp Hot Glue Gun): Essential for attaching smaller balloons to fill gaps, adding accent balloons, or securing balloons to each other for a fuller look. Ensure the glue is safe for balloons and won't pop them.
- Command Hooks or Strong Adhesive Hooks: For attaching your finished garland/arch to walls, doorways, or other surfaces without damaging them.
- Zip Ties or Floral Wire: Useful for securing sections of the arch together, attaching the arch to a frame, or reinforcing weak points.
5. Structural Support (for framed arches):
- PVC Pipe or Metal Arch Kit: If you're building a structured arch, you'll need a frame. These can be purchased online or at party supply stores, or you can DIY one from PVC pipes.
- Balloon Weights or Sandbags: To anchor the base of your frame, especially for outdoor use.
6. Scissors: For cutting balloon strip, string, or any other materials.
Having these items on hand will make the process of creating your balloon arch much more enjoyable and efficient, leading to a professional-looking result.
Step-by-Step Guide: How to Make a Stunning Balloon Arch
Today, we’re going to teach you how to make a fancy balloon arch using the popular balloon decorating strip method, which is incredibly versatile for both classic and organic styles. Learn how to create a stunning balloon arch for your next party with this easy DIY tutorial.
Step 1: Plan Your Design and Gather Materials
- Visualize: Decide on the size, shape, and color scheme of your balloon arch. Will it be a full arch, a half arch, or a garland draped along a wall?
- Measure: Estimate the length of balloon strip you'll need. A good rule of thumb is to measure the desired length of your arch and add a little extra.
- Prepare Your Space: Clear a large, clean area where you can inflate and assemble your balloons without them flying away or getting dirty.
Step 2: Inflate Your Balloons
- Vary Sizes (for Organic): If you're aiming for an organic look, inflate balloons to different sizes. Don't overinflate; balloons should be slightly soft to the touch to prevent popping and allow for better shaping.
- Consistent Sizes (for Classic): For a classic arch, inflate all balloons to a consistent size.
- Use Your Electric Pump: This is where your electric balloon pump becomes your best friend. Inflate a large batch of balloons before you start assembling.
- Tie Knots: Use a balloon tying tool to save your fingers. Ensure knots are tight to prevent air leakage.
Step 3: Assemble Your Balloon Clusters (Optional but Recommended for Fullness)
While you can directly insert single balloons into the strip, creating small clusters first adds fullness and makes assembly quicker.
- Duo or Quad Clusters: Take two balloons of similar size, tie their necks together. Then, take two more and do the same. Twist the two pairs together to form a quad cluster (a group of four balloons).
- Vary Cluster Sizes: For an organic look, create clusters of varying sizes using different balloon sizes.
Step 4: Attach Balloons to the Decorating Strip
This is where the magic happens. You can choose to make a balloon arch by securing balloons onto a balloon strip.
- Insert Knots: Take a balloon (or a balloon cluster) and pull its knot through one of the larger holes in the balloon strip, then slide it into the smaller slot to secure it.
- Alternate Sides: To create a full, even look, alternate the side of the strip you insert the balloons from. This helps the balloons sit closer together and fill out the arch.
- Mix Sizes and Colors: For an organic look, randomly mix balloon sizes and colors as you attach them. For a classic look, maintain your chosen pattern.
- Pack Tightly: Push the balloons tightly together along the strip to eliminate gaps and create a dense, impactful arch.
Step 5: Shape and Refine Your Arch
- Hang and Adjust: Once your strip is filled with balloons, carefully lift it and hang it in your desired location using Command hooks or zip ties.
- Shape: Gently bend and manipulate the balloon strip to achieve your desired arch shape. The flexibility of the strip allows for various curves.
- Fill Gaps: Use balloon glue dots to attach smaller balloons (5-inch or deflated larger ones) into any visible gaps. This adds depth and makes the arch look professionally done. You can also add decorative elements like faux flowers, greenery, or foil balloons using glue dots or floral wire.
Step 6: Secure Your Arch
- Anchor Points: Ensure your arch is securely fastened at multiple points to prevent it from falling or shifting, especially if it’s large or outdoors. Use strong adhesive hooks, zip ties to existing structures, or weights if using a frame.
- Check Stability: Give the arch a gentle tug to ensure it's stable.
By following these steps, you'll be well on your way to creating a beautiful and impressive balloon arch that will delight your guests and elevate your celebration. It's easier than it looks and packs a lot of visual wow factor!
Tips for a Professional-Looking Balloon Arch
Achieving that polished, professional look for your DIY balloon arch isn't just about following the steps; it's also about incorporating a few expert tips and tricks. These details can transform a good balloon arch into a truly stunning one.
- Don't Overinflate: This is crucial. Slightly underinflated balloons are more pliable, less likely to pop, and easier to pack tightly. Overinflated balloons look stiff, have a shiny, stretched appearance, and are prone to bursting. Aim for a matte finish on latex balloons, which indicates they are properly inflated.
- Vary Balloon Sizes (Especially for Organic Arches): As mentioned, using a range of balloon sizes (5-inch, 10-inch, 12-inch, 18-inch, etc.) is key to creating a dynamic and visually interesting organic balloon arch. The varying sizes add depth and dimension, mimicking natural forms.
- Double Stuffing (Advanced Technique): For unique custom colors or a richer, opaque look, try double stuffing. This involves inserting one balloon inside another (e.g., a white balloon inside a clear one, or a black inside a red). Inflate them together. This technique requires practice and a good quality electric pump but yields stunning results.
- Use Balloon Glue Dots Generously: These are your best friends for filling in any small gaps or attaching smaller accent balloons to the main structure. They help create a seamless, full appearance. You can also use them to attach foil balloons, flowers, or other decorative elements.
- Add Decorative Accents: Elevate your balloon arch by incorporating elements beyond just balloons. Think about adding:
- Faux or real flowers and greenery (eucalyptus, monstera leaves).
- Foil balloons (letters, numbers, shapes).
- Ribbons, tulle, or fabric drapes.
- LED fairy lights woven through the arch for an evening event.
- Pre-Assemble Sections: For very large arches, consider assembling it in smaller, manageable sections. You can then connect these sections at the venue using zip ties or fishing line. This makes transport and setup much easier.
- Consider the Backdrop: Think about where your arch will be placed. A plain wall provides a clean canvas, while a window or outdoor setting might require different anchoring methods. Ensure the colors of your arch complement the surrounding environment.
- Practice Makes Perfect: If you're new to balloon decorating, consider doing a small practice run with a few balloons to get a feel for inflation, tying, and attaching to the strip.
By keeping these tips in mind, you can create a balloon arch that looks like it was done by a professional, impressing all your guests and making your celebration truly special.
Troubleshooting Common Balloon Arch Challenges
Even with the best planning, DIY projects can present unexpected challenges. Here’s how to troubleshoot some common issues you might encounter when creating your balloon arch:
- Balloons Popping During Inflation or Assembly:
- Cause: Overinflation, cheap balloons, sharp objects, static electricity.
- Solution: Don't overinflate; balloons should be slightly soft. Invest in good quality balloons. Work in a clean area free of sharp edges. If static is an issue, lightly dampen your hands or the balloons with water.
- Arch Not Looking Full Enough:
- Cause: Not enough balloons, gaps between balloons, balloons not packed tightly.
- Solution: Use more balloons than you think you'll need. Push balloons tightly together on the decorating strip. Use balloon glue dots to attach smaller balloons into any visible gaps, creating a denser look.
- Arch Losing Air/Deflating Too Quickly:
- Cause: Poor quality balloons, loose knots, extreme temperature changes, small punctures.
- Solution: Always use high-quality balloons. Ensure all knots are tied securely. Avoid placing the arch in direct sunlight or extreme cold, which can cause balloons to expand and contract rapidly, leading to deflation or popping. Check for any small punctures from sharp objects during assembly.
- Arch Not Holding Its Shape:
- Cause: Insufficient support, too heavy, improper attachment to the strip/frame.
- Solution: If using a frame, ensure it's sturdy and properly weighted. If using a strip, ensure balloons are securely fastened and alternate sides as you attach them to distribute weight evenly. Add more attachment points to your wall or structure using strong hooks or zip ties.
- Balloons Sliding on the Decorating Strip:
- Cause: Knots not fully inserted into the smaller slot, or balloons are too large for the holes.
- Solution: Make sure you pull the balloon knot all the way through the large hole and firmly slide it into the smaller slot to lock it in place. If using very large balloons, you might need to secure them with an additional twist tie or fishing line to the strip.
- Difficulty Hanging the Arch:
- Cause: Arch is too heavy, not enough attachment points, or hooks aren't strong enough.
- Solution: Get help from a friend! Two people make hanging much easier. Use multiple strong Command hooks or other appropriate fasteners for your surface. If the arch is very long, consider assembling it in sections and then connecting them once hung.
- Static Cling Making Balloons Stick Together or Attract Dust:
- Cause: Dry air, friction.
- Solution: Lightly spray balloons with an anti-static spray or a very diluted solution of water and fabric softener. Work in a slightly humid environment if possible.
By anticipating these common issues and knowing how to address them, you can confidently tackle your balloon arch project and achieve a flawless result.
Beyond the Arch: Creative Uses for Balloons
While the balloon arch is undeniably a showstopper, the versatility of balloons extends far beyond this classic form. Once you've mastered the techniques for creating an arch, you'll find that the same principles can be applied to a myriad of other creative balloon decorations, allowing you to further enhance your party's aesthetic and theme.
- Balloon Garlands: Essentially a deconstructed arch, a balloon garland can be draped along staircases, across mantels, around doorways, or even suspended from the ceiling. They offer a more flexible and often simpler alternative to a full arch, perfect for adding pops of color and festivity to various areas of your venue.
- Balloon Columns/Towers: Similar to an arch but vertical, balloon columns are excellent for framing entrances, stage areas, or as standalone decor elements. They are often built around a pole or weighted base and can be topped with a large foil balloon, a number, or a character.
- Balloon Walls/Backdrops: For an ultimate photo opportunity, create a full balloon wall. This involves attaching balloons directly to a large board or frame, completely covering it to create a dense, textured backdrop. This is perfect for photo booths or dessert tables.
- Balloon Centerpieces: Smaller balloon clusters can be used as eye-catching table centerpieces. Combine them with floral arrangements, battery-operated lights, or other thematic elements for a unique touch.
- Balloon Bouquets: A classic choice, balloon bouquets can be made with a mix of latex and foil balloons, weighted down, and placed strategically around the party area. They add height and color without the scale of an arch.
- Ceiling Decor: Inflate balloons with helium and let them float to the ceiling, perhaps with curling ribbons dangling down. For a more dramatic effect, create a "balloon cloud" by attaching clusters of balloons to a net or fishing line and suspending it from the ceiling.
- Balloon Mosaics: These are increasingly popular and involve creating a large number or letter outline from foam board, then filling it with small, uniformly sized balloons. They make fantastic personalized decor for birthdays, anniversaries, or graduations.
- Balloon Confetti Poppers: For a fun interactive element, create large balloons filled with confetti that guests can pop at a designated time, showering the area with colorful pieces.
By exploring these creative applications, you can maximize your balloon decorating skills and transform any space into a truly immersive and festive environment. The possibilities are truly endless when it comes to celebrating with balloons!
Conclusion: Elevate Your Celebrations with a DIY Balloon Arch
As we've explored, a balloon arch is far more than just a collection of inflated balloons; it's a powerful statement piece that can utterly transform the atmosphere of any celebration. From adding a dramatic flair to a birthday party to
Related Resources:


Detail Author:
- Name : Jules Kohler
- Username : kmarks
- Email : lhills@gmail.com
- Birthdate : 2002-08-24
- Address : 74732 Blanda Mountains Maurineshire, VA 91770
- Phone : 580.703.2178
- Company : Hagenes-Homenick
- Job : Coaches and Scout
- Bio : Voluptatem magnam incidunt culpa at. Ipsa eum aut harum occaecati incidunt. Sint possimus molestiae sapiente ipsum. Reprehenderit eos impedit reiciendis vel et. Magnam consectetur ut eum enim ex.
Socials
facebook:
- url : https://facebook.com/arjun9087
- username : arjun9087
- bio : Delectus rerum eaque rerum occaecati. Quae nobis corrupti neque et aut.
- followers : 3704
- following : 1828
tiktok:
- url : https://tiktok.com/@aprice
- username : aprice
- bio : Enim est consequatur ut minima asperiores a optio.
- followers : 2739
- following : 495
linkedin:
- url : https://linkedin.com/in/arjun5939
- username : arjun5939
- bio : Autem voluptatem harum iure hic.
- followers : 4296
- following : 354
