Embarking on a new artistic journey can feel both exciting and a little daunting, but what if we told you that learning how to draw a cross could be your perfect starting point? This seemingly simple shape holds immense potential for creativity, allowing you to create all sorts of amazing designs, from basic outlines to intricate, meaningful artworks. Whether you're an aspiring artist just picking up a pencil or simply looking to expand your drawing skills, this comprehensive guide is designed to provide you with the knowledge and inspiration to create beautiful and meaningful cross drawings.
Many perceive drawing as a complex skill reserved for a select few, but the truth is, anyone can learn with the right guidance and a bit of practice. This art lesson for beginners is here to show you how incredibly easy it can be when you have clear, step-by-step instructions to follow. Forget the intimidation; our aim is to demystify the process of cross drawing, making it accessible and enjoyable for everyone. So, gather your materials, settle in, and prepare to discover the rewarding world of drawing.
Table of Contents
- The Enduring Appeal of Cross Drawing
- Essential Tools for Your Cross Drawing Journey
- Mastering the Fundamentals: How to Draw a Simple Cross (Step-by-Step)
- Beyond the Basics: Exploring Different Cross Designs
- Adding Depth and Dimension: Inking and Coloring Your Cross Drawing
- Tips for Beginners: Making Your Cross Drawing Experience Smooth
- The Benefits of Practicing Cross Drawing
- Expanding Your Artistic Horizons with Cross Drawing
The Enduring Appeal of Cross Drawing
The cross is a universally recognized symbol, carrying diverse meanings across cultures, religions, and historical periods. From simple geometric forms to ornate, decorative elements, its versatility makes it a fascinating subject for artists of all levels. For beginners, the cross offers an excellent opportunity to practice fundamental drawing skills such as straight lines, symmetry, and proportion. Its clear structure provides a solid framework upon which to build confidence and develop precision.
Beyond its structural benefits, drawing a cross can also be a deeply personal and meditative experience. Many find solace and focus in the repetitive motions and the creation of a symbol that holds personal significance. Whether you're drawing it for religious expression, decorative purposes, or simply as a geometric exercise, the act of cross drawing is a powerful way to engage with your creative side. It's a foundational skill that opens doors to more complex designs and artistic expressions, proving that even the simplest shapes can be profoundly inspiring.
Essential Tools for Your Cross Drawing Journey
Before you dive into the specifics of how to draw a cross, it's helpful to gather the right materials. The good news is, you don't need an extensive art studio to get started. Many of the tools you'll need are likely already around your home or are easily accessible at any art supply store. Having the right tools ensures a smoother and more enjoyable drawing experience, helping you achieve better results from the outset.
Basic Materials
- Pencils: A standard HB pencil is perfect for sketching. You might also consider a harder pencil (like 2H) for lighter guidelines and a softer one (like 2B or 4B) for darker lines and shading.
- Paper: Any plain white paper will do for practice. As you advance, you might explore heavier drawing paper or sketchbooks.
- Eraser: A good quality vinyl or kneaded eraser is essential for correcting mistakes and cleaning up your lines without smudging.
- Ruler: This is perhaps the most crucial tool for accurate cross drawing, especially for beginners. As the "Data Kalimat" states, "You can use a ruler to help draw." It ensures your lines are straight and your proportions are correct, which is key to a well-formed cross.
Advanced Options
Once you're comfortable with the basics, you might want to experiment with other mediums to add flair to your cross drawing:
- Fine-liner Pens: For inking your finished pencil drawing, fine-liner pens in various thicknesses (e.g., 0.1mm, 0.3mm, 0.5mm) can give your lines a crisp, professional look.
- Markers: If you're looking to add color, markers offer vibrant hues and smooth application. You can even "Get your free marker guide for beginners" by exploring resources online to understand different marker types and techniques.
- Colored Pencils or Pastels: These are excellent for adding subtle shading and color, allowing for more nuanced artistic expression.
- Compass: While not strictly necessary for a basic cross, a compass can be useful if you plan to incorporate circular elements or more complex designs around your cross.
Having your materials ready will allow you to jump straight into the practical steps without interruption. Remember, the goal is to make the process enjoyable and accessible.
Mastering the Fundamentals: How to Draw a Simple Cross (Step-by-Step)
This section is your core lesson on how to draw a cross. We'll break down the process into easy-to-follow phases, ensuring that by following these simple steps, you too can easily draw a great-looking cross. This step-by-step lesson will instruct you how to draw a cross, focusing on precision and clarity. We will pay attention to the shapes of each area and types of contours drawn, making sure that the drawing looks right.
Phase 1: Laying the Foundation
In this drawing lesson, we’ll show how to draw a cross step by step, total 5 phases here. This first phase is all about establishing the basic structure:
- Start with a Vertical Line: Using your ruler, draw a perfectly straight vertical line in the center of your paper. This will be the main shaft of your cross. Its length will determine the overall size of your cross, so consider how large you want your final drawing to be.
- Add a Horizontal Line: Now, draw a horizontal line that intersects your vertical line. For a traditional Latin cross, this horizontal line should be shorter than the vertical one and positioned closer to the top of the vertical line, rather than exactly in the middle. Use your ruler to ensure it's perfectly straight and perpendicular to the vertical line.
- Establish Proportions: This is where you start to define the shape. Imagine the cross having a consistent width. Lightly draw parallel lines on either side of your initial vertical and horizontal lines to establish the desired thickness of the cross's arms. For instance, if your vertical line is 10 units long, your horizontal line might be 6 units long, and the width of the arms could be 1 unit.
- Draw a Small Square in the Middle: As suggested in the "Data Kalimat," you can "Draw a small square in the middle of your outline" where the two main lines intersect. This helps to visualize the central point and ensures that the arms extend evenly from a solid core. This square doesn't have to be perfect, just a light guide.
These initial lines are your blueprint. Keep them light, as you may need to erase and adjust them. The key here is accuracy and establishing a balanced foundation for your cross drawing.
Phase 2: Refining the Form
Now that you have your basic framework, it's time to refine the shape and make it look like a solid cross:
- Connect the Lines to Form the Outline: Using your ruler, connect the parallel lines you drew in Phase 1 to form the clear outline of your cross. You'll essentially be drawing the four sides of the vertical shaft and the two ends of the horizontal arm. Make sure your corners are sharp and clean.
- Refine the Bottom and Top: "First, draw two lines and curves at the bottom." For a traditional cross, the bottom might have a slight taper or a base. Similarly, "draw a fragment of the cross at the top" – this might mean a slightly rounded top, or simply ensuring the top arm is clearly defined. This step allows for slight variations in style.
- Erase Unnecessary Guidelines: Once your main outline is complete and you're happy with the shape, carefully erase all the initial light guidelines, leaving only the clean, solid outline of your cross. This step makes your drawing look much neater and more professional.
- Add Details (Optional): At this point, you have a perfectly good basic cross. However, you can choose to add simple details. For instance, you might add a slight bevel to the edges to give it a more three-dimensional look, or a subtle texture.
And there you have it! A complete, well-proportioned cross drawing. This "easy tutorial" provides a solid foundation, and with practice, you'll find yourself drawing crosses with increasing speed and confidence.
Beyond the Basics: Exploring Different Cross Designs
Once you've mastered the simple cross, the world of cross drawing truly opens up. The "Data Kalimat" mentions, "This tutorial will teach you how to draw two different kinds of crosses," and even more specifically, "In this tutorial, we will learn how to draw a simple cross, a cross covered with cloth, and a 3d cross." This highlights the vast possibilities for variation. Here are a few popular types of crosses you can try to draw, each offering a unique challenge and aesthetic:
- Latin Cross: The most common form, with a longer vertical arm and a shorter horizontal arm positioned above the midpoint. This is what we focused on in the step-by-step guide.
- Greek Cross: Features four arms of equal length, intersecting in the middle. This offers a different challenge in achieving perfect symmetry.
- Celtic Cross: A Latin cross with a circle surrounding the intersection of the arms. This adds an element of circular geometry and often includes intricate knotwork designs.
- Crucifix: A cross with the figure of Christ on it. This requires more advanced anatomical drawing skills, but you can start by sketching a simple, stylized figure.
- 3D Cross: As mentioned, creating a 3D cross involves understanding perspective and shading to give the illusion of depth. This is an excellent exercise in spatial reasoning in drawing.
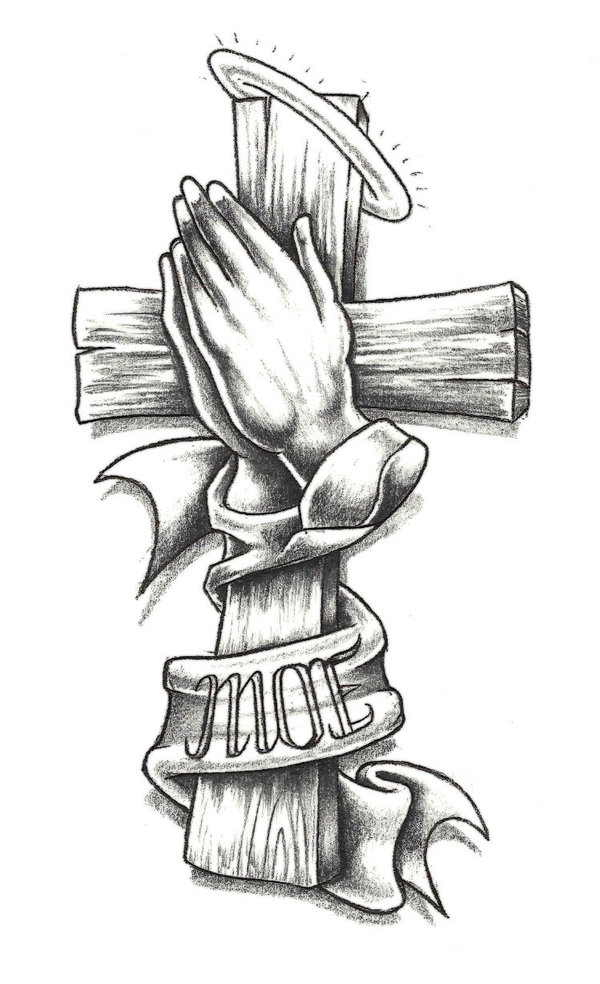
- Cross Covered with Cloth: This type of cross drawing introduces the challenge of rendering fabric, including folds, drapes, and shadows, adding a dynamic and expressive element to the static cross form.
Each variation allows you to practice different drawing techniques, from precise geometric construction to organic drapery and perspective. Don't be afraid to experiment and combine elements from different styles to create your unique cross designs.
Adding Depth and Dimension: Inking and Coloring Your Cross Drawing
A pencil sketch is a great start, but to truly bring your cross drawing to life, you'll want to "Draw, ink, and color your cross drawing." This process adds definition, vibrancy, and a finished look to your artwork.
- Inking: Once your pencil sketch is complete and you're satisfied with the lines, carefully go over them with a fine-liner pen. Use a steady hand and try to make your lines clean and confident. You can vary the line weight (thicker lines for outlines, thinner for internal details) to add interest. Allow the ink to dry completely before moving to the next step to avoid smudging.
- Erasing Pencil Lines: After inking, gently erase all remaining pencil lines. This will make your inked drawing stand out crisply against the paper.
- Coloring: Now for the fun part! Whether you choose markers, colored pencils, watercolors, or even digital tools, adding color can transform your cross.
- Flat Color: For a simple, bold look, apply a single, even layer of color to the entire cross.
- Shading and Highlights: To create depth and dimension, consider where your light source is coming from. Apply darker shades to areas that would be in shadow and leave lighter areas for highlights. This is especially important if you're attempting a 3D cross drawing.
- Texture: Experiment with different coloring techniques to add texture. For instance, short, choppy strokes with a colored pencil can mimic wood grain, while smooth blending can suggest metal or stone.
Remember, coloring is an opportunity for personal expression. Don't be afraid to experiment with different color palettes and techniques. The goal is to make your cross drawing visually appealing and reflective of your artistic vision.
Tips for Beginners: Making Your Cross Drawing Experience Smooth
Learning how to draw a great looking cross with easy drawing instructions is entirely achievable, but like any new skill, a few pointers can make the journey much smoother. Here are some invaluable tips, especially for those just starting out:
- Start Simple: Don't try to draw a highly ornate, detailed cross on your first attempt. Master the basic form first. As the "Data Kalimat" suggests, "This guide for kids is here to show you how easy it can be when you have steps to follow." This applies to all beginners – simplicity builds confidence.
- Practice Makes Perfect: Drawing is a skill that improves with consistent practice. Don't get discouraged if your first few attempts aren't perfect. Keep drawing, and you'll notice improvement over time.
- Use Reference Images: If you're trying to draw a specific type of cross (like a Celtic cross or a 3D cross), look up reference images online or in books. Observing how others have drawn similar forms can provide valuable insights.
- Don't Be Afraid to Erase: Your eraser is your best friend. Use it liberally to correct mistakes and refine your lines. Light initial sketches are key for this.
- Focus on Proportions: The "Data Kalimat" emphasizes, "We will pay attention to the shapes of each area and types of contours drawn making sure that the drawing looks right." This is crucial for a balanced cross. Use your ruler and constantly compare the lengths and widths of different parts of your cross.
- Take Breaks: If you feel frustrated, step away from your drawing for a few minutes. A fresh perspective can often help you spot areas for improvement that you missed before.
- Explore Resources: The internet is full of resources. You can find "video tutorial, plus free printable pages" to aid your learning. Websites like "easy drawings net" (which states "made with lot of love" and has garnered significant views) or "drawing123.com" often provide excellent step-by-step visual guides.
- Enjoy the Process: Most importantly, have fun! Drawing should be an enjoyable and relaxing activity. Embrace the learning process, celebrate small victories, and let your creativity flow.
By keeping these tips in mind, your cross drawing journey will be a rewarding one, leading to beautiful and meaningful creations.
The Benefits of Practicing Cross Drawing
While the immediate goal might be to simply learn how to draw a cross, the act of consistent practice offers a multitude of benefits that extend far beyond just mastering this one symbol. Engaging in cross drawing, or any form of structured drawing, can significantly enhance various cognitive and motor skills, proving to be a valuable activity for personal development.
- Improved Hand-Eye Coordination: The precise movements required for drawing straight lines, achieving symmetry, and connecting points directly translate into better control and coordination between your eyes and hands. This skill is transferable to many other activities, from sports to intricate crafts.
- Enhanced Observation Skills: To draw accurately, you must learn to truly see. Practicing cross drawing encourages you to pay close attention to details, proportions, and angles, sharpening your ability to observe the world around you with greater precision.
- Patience and Persistence: Drawing, especially when learning new techniques, requires patience. You will make mistakes, and learning to correct them and persist through challenges builds resilience and a strong work ethic. This mental fortitude is invaluable in all aspects of life.
- Problem-Solving Abilities: When a line doesn't look right, or a proportion is off, you engage in a mini problem-solving exercise. How can you adjust it? What is the underlying issue? This fosters critical thinking and creative solutions.
- Stress Reduction and Mindfulness: Many find drawing to be a meditative activity. Focusing on the lines, shapes, and the creative process can be incredibly calming, helping to reduce stress and promote mindfulness. It's a wonderful way to disconnect from daily pressures and immerse yourself in a creative flow state.
- Boosted Confidence: Successfully completing a drawing, especially one that you initially thought was challenging, provides a significant boost to self-confidence. This sense of accomplishment can inspire you to tackle other new skills and challenges.
Ultimately, practicing cross drawing is not just about the final artwork; it's about the journey of learning, growing, and developing a deeper connection with your own creative capabilities. It’s a testament to the idea that simple, focused effort can yield profound personal benefits.
Expanding Your Artistic Horizons with Cross Drawing
As you become more proficient in cross drawing, you'll realize that this foundational skill is a springboard for countless other artistic endeavors. The principles you learn here—precision, proportion, perspective, and shading—are universally applicable across various drawing subjects and styles. Whether you’re an aspiring artist or simply looking to expand your drawing skills, this guide will provide you with the knowledge and inspiration to create beautiful and meaningful art beyond just crosses.
Consider how the techniques used for drawing a 3D cross can be applied to drawing other three-dimensional objects like cubes, buildings, or even characters. The attention to detail required for a cross covered with cloth can be transferred to drawing drapery on figures, flags, or elaborate costumes. The geometric precision learned from a simple cross can be invaluable for architectural drawing, technical illustrations, or even abstract art.
Furthermore, cross drawing can be integrated into larger compositions. Imagine a cross as a central element in a landscape, a religious scene, or a symbolic piece. You can experiment with different backgrounds, textures, and lighting to evoke various moods and messages. The ability to confidently draw a cross also opens up possibilities for design work, such as creating logos, patterns, or decorative motifs.
So, "To draw these tutorials take out your material and start." Don't view cross drawing as an end in itself, but rather as a powerful tool in your growing artistic toolkit. Embrace the journey, continue to experiment, and let the skills you acquire here empower you to explore new dimensions of your creativity.
Conclusion
We've journeyed through the fundamentals of cross drawing, from gathering your essential tools to mastering the step-by-step process of creating a simple cross. We've also explored the exciting possibilities of different cross designs, the importance of inking and coloring, and invaluable tips to smooth your learning curve. Remember, learning how to draw a cross is not just about replicating a shape; it's about developing foundational artistic skills that will serve you well in all your creative pursuits. The benefits of this practice extend beyond the canvas, fostering patience, observation, and a deeper connection with your artistic self.
Your artistic journey is a continuous one, filled with discovery and growth. We hope this guide has provided you with the confidence and inspiration to pick up your pencil and start creating. What kind of cross will you draw first? Share your thoughts or questions in the comments below – we'd love to hear from you! And if you found this guide helpful, consider sharing it with fellow aspiring artists. Don't forget to explore our other drawing tutorials to continue expanding your skills and unlocking your full artistic potential.
Related Resources:


Detail Author:
- Name : Althea Padberg
- Username : bode.daisy
- Email : yasmeen38@hotmail.com
- Birthdate : 1987-02-20
- Address : 383 Lorenz Crest North Amiyaburgh, TN 02911
- Phone : 743.990.2236
- Company : Schiller, Gutkowski and Jones
- Job : Immigration Inspector OR Customs Inspector
- Bio : Minus provident repellendus dignissimos sed. Aut maiores molestiae fugiat eum. Quos laboriosam maxime molestiae perspiciatis voluptatem doloremque modi.
Socials
twitter:
- url : https://twitter.com/tillmanc
- username : tillmanc
- bio : Sint magni eos ab et quia ex. Officia saepe sit reprehenderit aliquid nisi.
- followers : 692
- following : 763
linkedin:
- url : https://linkedin.com/in/colleen_official
- username : colleen_official
- bio : Blanditiis quo soluta voluptatem.
- followers : 5959
- following : 2157
